The ASRock Fatal1ty Z270 Gaming-ITX/ac Motherboard Review
by E. Fylladitakis on September 19, 2017 9:00 AM EST- Posted in
- Motherboards
- Intel
- ASRock
- Mini ITX
- Z270
- 7700K
- Z270 Gaming ITX/ac
The ASRock Z270 Gaming-ITX/ac Review
BIOS
Like every advanced motherboard these days, the Z270 Gaming-ITX/ac features a graphical BIOS that defaults to an “EZ Mode” homepage. This is a single page mode that includes only basic configuration settings and informative dials. From this page, the user can only switch the boot device priority, engage DRAM XMP profiles, change the fan speed setting and engage pre-programmed CPU overclocking profiles.
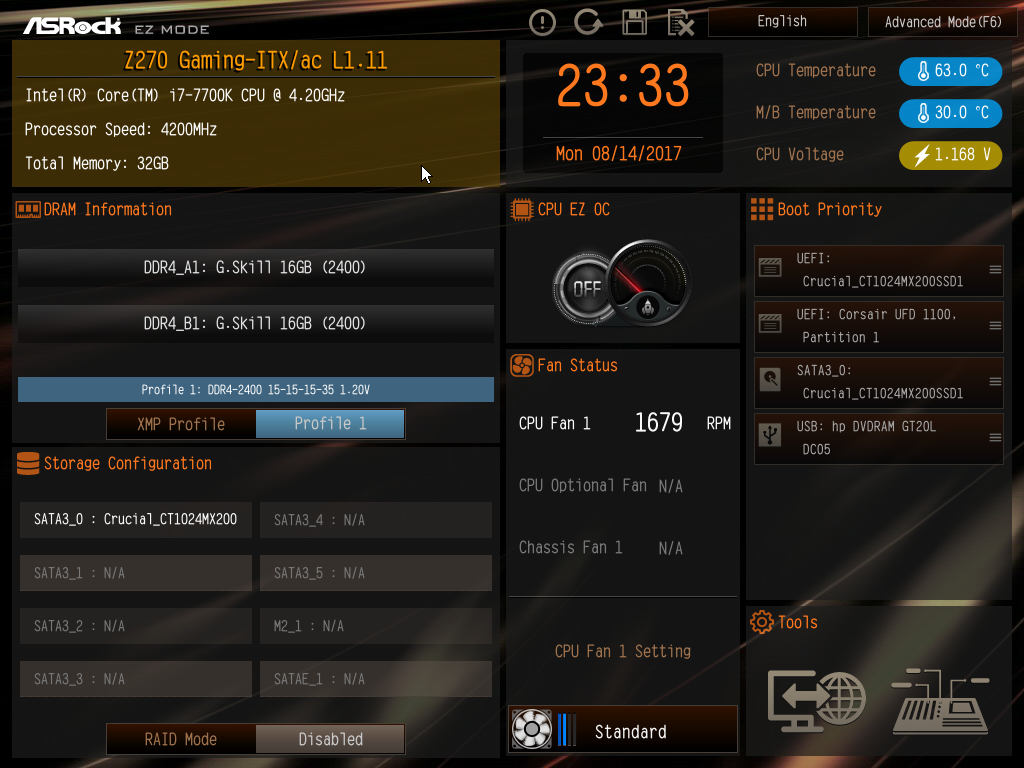
BIOS upgrade, device identification, and fan speed tuning tools are also accessible through the icons found at the bottom right corner of the screen. The “Instant Flash” tool can be used to flash a BIOS that is already stored into a local disk drive and the “Internet Flash” will access and check ASRock’s servers for a newer BIOS version. The “System Browser” tool brings up an image of the motherboard and its rear I/O panel, where the user can “explore” the board using the mouse pointer. The tool will display information on the device that is attached/connected on the port or slot that the pointer is placed on. Finally, the “FAN-Tastic” tuning tool brings up a red screen where the thermal profile of the cooling fans connected to the motherboard’s headers can be either selected from four pre-programmed presets or be manually programmed.


The full BIOS of the Z270 Gaming-ITX/ac can be accessed by pressing the F6 key and has eight major tabs, yet the bulk of the tweakable settings and options can be found under just two of them. The first tab is the “Main” Tab and only includes system information and a list of settings that have been flagged by the user as “Favorite”. Skipping down to the fourth tab, the “Tools” tab that is, we find the same tools that are accessible via the “EZ mode” screen, plus two more: the “UEFI Tech Service”, which is practically sends a direct message to ASRock’s customer support from inside the BIOS, and the “Network Configuration” submenu that allows the user to manually set up the system’s IP rather than having DHCP do it automatically.

The fifth tab, dubbed “H/W Monitor”, initially appears to be a purely informative screen. However, scrolling down the page reveals the fan settings, allowing the user to choose pre-programmed or program new thermal profiles for the cooling fans connected on the motherboard’s headers. The “FAN-Tastic” tuning tool is also accessible via this screen.
In the three last tabs, we find typical BIOS options that have to do with the system’s security and boot options, options that we do typically see programmed into any motherboard BIOS. That leaves us with just two tabs, the “OC Tweaker” and the “Advanced” tabs, each of which holds many submenus and numerous sub settings.
The “OC Tweaker” tab initially displays only one configurable option, the “Load Optimized CPU OC setting” option that can be used to automatically overclock an unlocked CPU at a specified speed, and three submenus. The first submenu hosts all of the CPU settings, the second the DRAM settings, and the third all voltage configuration settings.
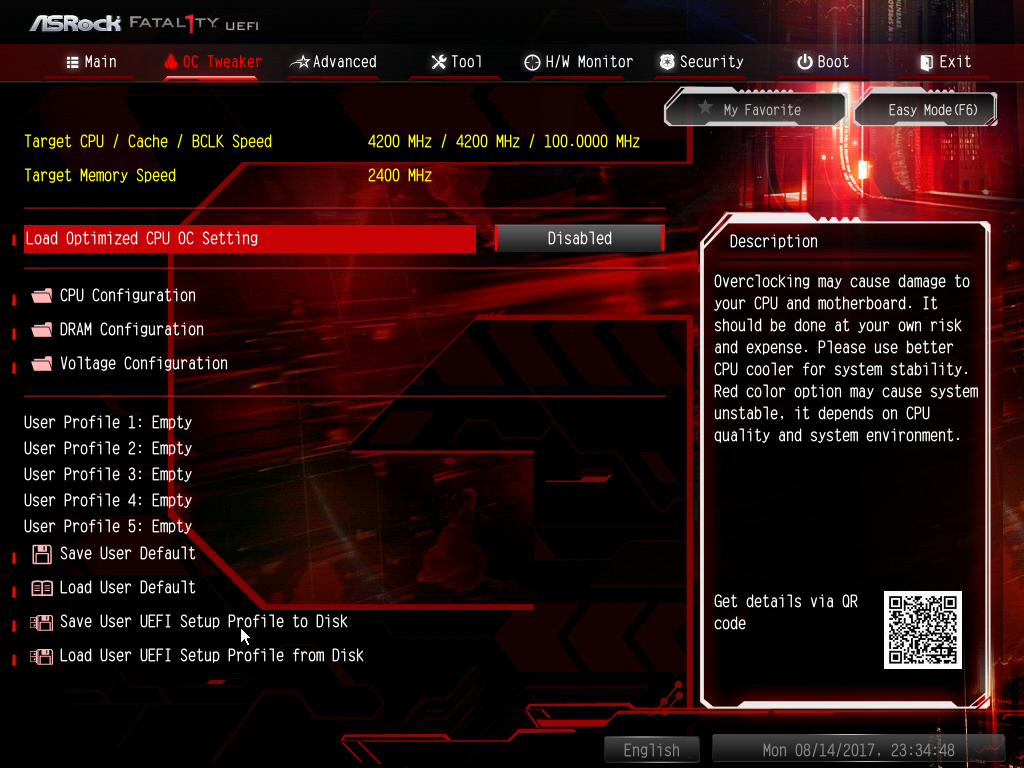
The “CPU Configuration” submenu includes all of the CPU-related options, such as the multiplier, BCLK frequency, Intel-specific features and power limits. The “DRAM Tweaker” begins with the XMP settings and basic RAM timings. As the user begins scrolling down, the menu expands to “primary”, “secondary”, “third”, “fourth” and “advanced” timings, offering a ridiculous number of possible timing adjustments that even seasoned overclockers will not be fiddling with. Finally, the “Voltage Configuration” submenu allows for the manipulation of the CPU, DRAM, PCH and other voltage lines. It is interesting to note that neither the range or step of the voltage settings is great. For example, the CPU voltage can only go up to 1.5 volts and in 50 mV steps. Still, these settings will be more than adequate for most users.

The “Advanced” tab includes all of the configuration options for the motherboard’s features and onboard devices. Once again there is a “CPU Configuration” submenu, with the options that ASRock probably assumed that they are not relevant for overclockers. Most of these options control features of the CPU, such as hyper threading and virtualization. Among these options lies the disabling of thermal throttling, which may be used by experienced overclockers but can be very dangerous.
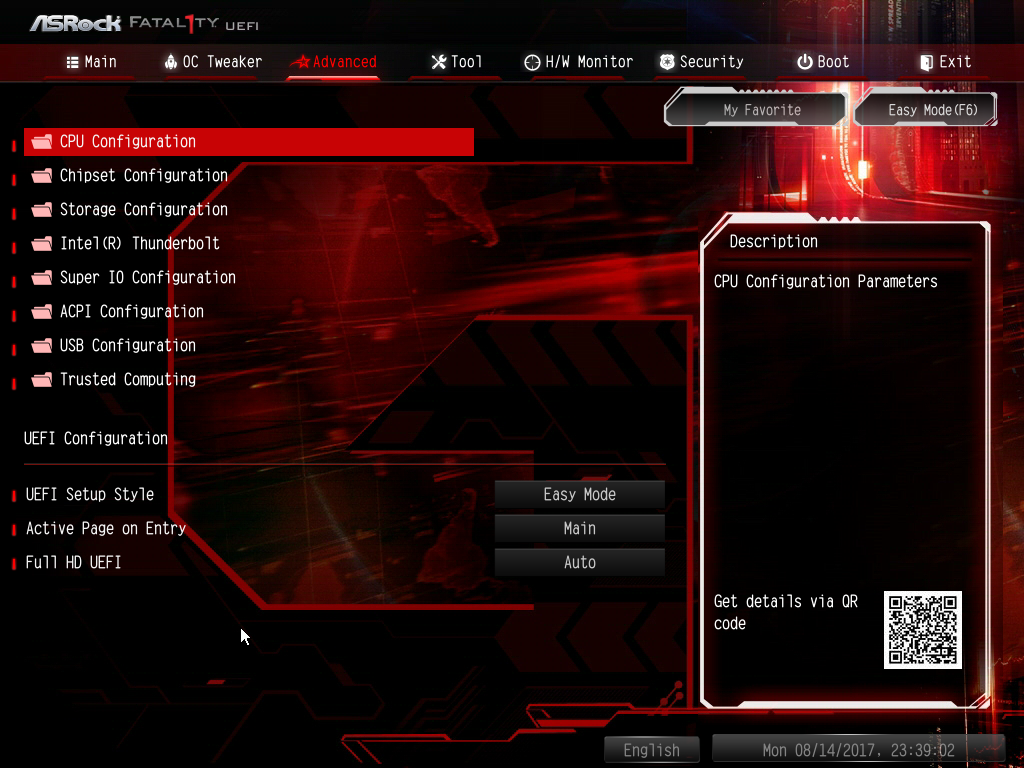
The “Chipset Configuration” submenu includes advanced options for the chipset’s link speeds and iGPU, and allows the disabling of the onboard audio and LAN devices. The rest of the submenus are straightforward, with the “Storage Configuration” including the SATA control options, the “Super I/O” the settings for the PS/2 port, etc. There is nothing out of the ordinary in any of these submenus.


41 Comments
View All Comments
Dug - Wednesday, September 20, 2017 - link
It's all tweets taking up the right hand side of the web page that gives users absolutely no context on what is being discussed. This really needs to go back to a hardware and news site with real reviews that don't chop up graphs with different products for different benchmarks.Oxford Guy - Monday, September 25, 2017 - link
Intel released a microcode update in April to fix the Skylake hyperthreading flaw (a crash/data corruption bug) but guess what AsRock's BIOS for the 170 version of this board is at? 2016, dude.Just peddle a new board instead of providing the most minimal amount of customer service. We're supposed to just turn off hyperthreading, apparently.
AsRock should be tarred and feathered by the tech press but, instead, no one wants to talk about practices like this at all. Just push the latest thing. Am I surprised that Anandtech is clearly oblivious about the hyperthreading bug and AsRock's lack of support for the 170 board? Nope.
zepi - Tuesday, September 19, 2017 - link
"and the 10Mbps ports are now called “USB 3.1 Gen 2”" - I suppose 10Gbps...Der Keyser - Tuesday, September 19, 2017 - link
Small correction: I have this board, and it drives my two 4k displays at 60hz without issue (displayport and HDMi 2.0). So your article is wrong on this count.It is capable of driving three 4k displays at 60hz if you attach a third monitor to the thunderbolt 3 port (displayport alternate mode). I have found several sources online doing just that.
Vatharian - Tuesday, September 19, 2017 - link
Oh no. They made SATA Express port. Don't tell me it's going to make a comeback now...edzieba - Tuesday, September 19, 2017 - link
They've been standard on every board I've seen for years. It takes up barely more space than the pair of SATA connectors everyone uses it as, and otherwise serves as a handy pair of PCIe lanes for front panel modules.edzieba - Tuesday, September 19, 2017 - link
A shame ASRock dropped a USB port over the previous Z170 Gaming ITX. Though at this point, I'm waiting for Z370 to see how the notional i7-8xxx compares to the i7-7820x on ASRock's X299 ITX board (probably a performance regression for most workloads, but dual m.2 NAND SSDs plus an Optane cache is a tempting option for ITX).jrs77 - Tuesday, September 19, 2017 - link
I'm still waiting for a mITX-board with two M.2 slots, so I can ditch cables alltogether. One small fast M.2 for the OS and one cheaper big one for storage. Add a picoPSU and you got rid of all the cables unnecessary cables.wolfemane - Tuesday, September 19, 2017 - link
Then what you are looking for is the Asus z270i Strix board . 1 sata/pcie m.2 slot and 1 pcie m.2 slot.jrs77 - Tuesday, September 19, 2017 - link
Get rid of all this fancy stuff noone really needs and bring the price down to a reasonable level doing so and I'm interested.