The ASRock Fatal1ty Z270 Gaming-ITX/ac Motherboard Review
by E. Fylladitakis on September 19, 2017 9:00 AM EST- Posted in
- Motherboards
- Intel
- ASRock
- Mini ITX
- Z270
- 7700K
- Z270 Gaming ITX/ac
The ASRock Z270 Gaming-ITX/ac Review
BIOS
Like every advanced motherboard these days, the Z270 Gaming-ITX/ac features a graphical BIOS that defaults to an “EZ Mode” homepage. This is a single page mode that includes only basic configuration settings and informative dials. From this page, the user can only switch the boot device priority, engage DRAM XMP profiles, change the fan speed setting and engage pre-programmed CPU overclocking profiles.
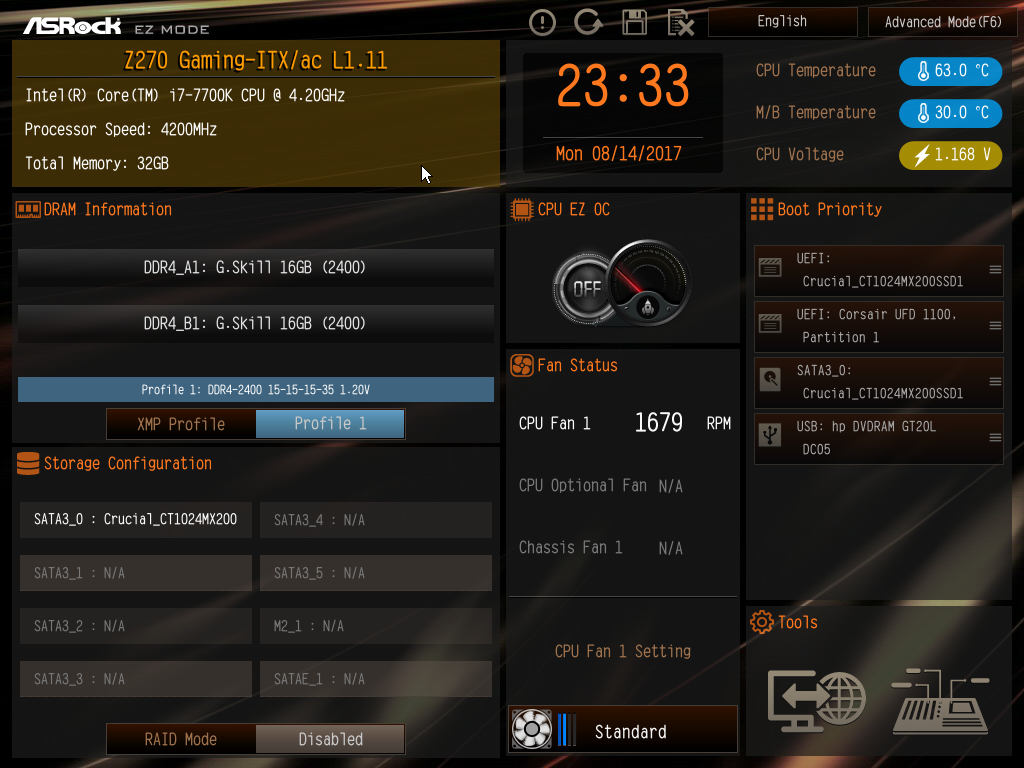
BIOS upgrade, device identification, and fan speed tuning tools are also accessible through the icons found at the bottom right corner of the screen. The “Instant Flash” tool can be used to flash a BIOS that is already stored into a local disk drive and the “Internet Flash” will access and check ASRock’s servers for a newer BIOS version. The “System Browser” tool brings up an image of the motherboard and its rear I/O panel, where the user can “explore” the board using the mouse pointer. The tool will display information on the device that is attached/connected on the port or slot that the pointer is placed on. Finally, the “FAN-Tastic” tuning tool brings up a red screen where the thermal profile of the cooling fans connected to the motherboard’s headers can be either selected from four pre-programmed presets or be manually programmed.


The full BIOS of the Z270 Gaming-ITX/ac can be accessed by pressing the F6 key and has eight major tabs, yet the bulk of the tweakable settings and options can be found under just two of them. The first tab is the “Main” Tab and only includes system information and a list of settings that have been flagged by the user as “Favorite”. Skipping down to the fourth tab, the “Tools” tab that is, we find the same tools that are accessible via the “EZ mode” screen, plus two more: the “UEFI Tech Service”, which is practically sends a direct message to ASRock’s customer support from inside the BIOS, and the “Network Configuration” submenu that allows the user to manually set up the system’s IP rather than having DHCP do it automatically.

The fifth tab, dubbed “H/W Monitor”, initially appears to be a purely informative screen. However, scrolling down the page reveals the fan settings, allowing the user to choose pre-programmed or program new thermal profiles for the cooling fans connected on the motherboard’s headers. The “FAN-Tastic” tuning tool is also accessible via this screen.
In the three last tabs, we find typical BIOS options that have to do with the system’s security and boot options, options that we do typically see programmed into any motherboard BIOS. That leaves us with just two tabs, the “OC Tweaker” and the “Advanced” tabs, each of which holds many submenus and numerous sub settings.
The “OC Tweaker” tab initially displays only one configurable option, the “Load Optimized CPU OC setting” option that can be used to automatically overclock an unlocked CPU at a specified speed, and three submenus. The first submenu hosts all of the CPU settings, the second the DRAM settings, and the third all voltage configuration settings.
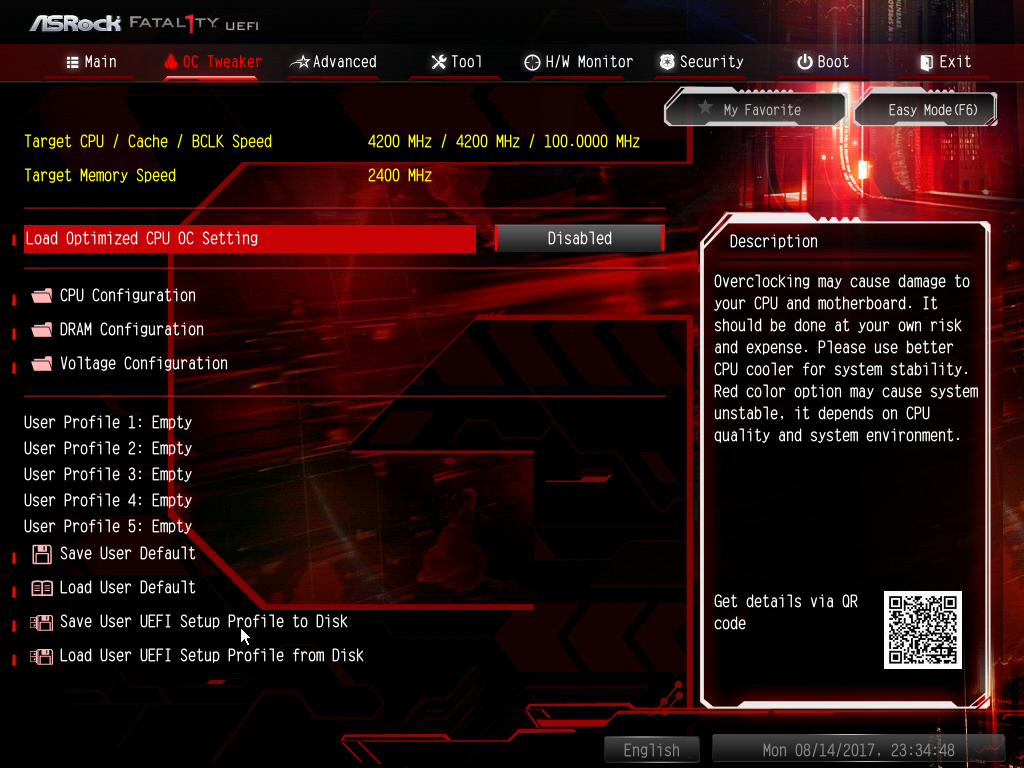
The “CPU Configuration” submenu includes all of the CPU-related options, such as the multiplier, BCLK frequency, Intel-specific features and power limits. The “DRAM Tweaker” begins with the XMP settings and basic RAM timings. As the user begins scrolling down, the menu expands to “primary”, “secondary”, “third”, “fourth” and “advanced” timings, offering a ridiculous number of possible timing adjustments that even seasoned overclockers will not be fiddling with. Finally, the “Voltage Configuration” submenu allows for the manipulation of the CPU, DRAM, PCH and other voltage lines. It is interesting to note that neither the range or step of the voltage settings is great. For example, the CPU voltage can only go up to 1.5 volts and in 50 mV steps. Still, these settings will be more than adequate for most users.

The “Advanced” tab includes all of the configuration options for the motherboard’s features and onboard devices. Once again there is a “CPU Configuration” submenu, with the options that ASRock probably assumed that they are not relevant for overclockers. Most of these options control features of the CPU, such as hyper threading and virtualization. Among these options lies the disabling of thermal throttling, which may be used by experienced overclockers but can be very dangerous.
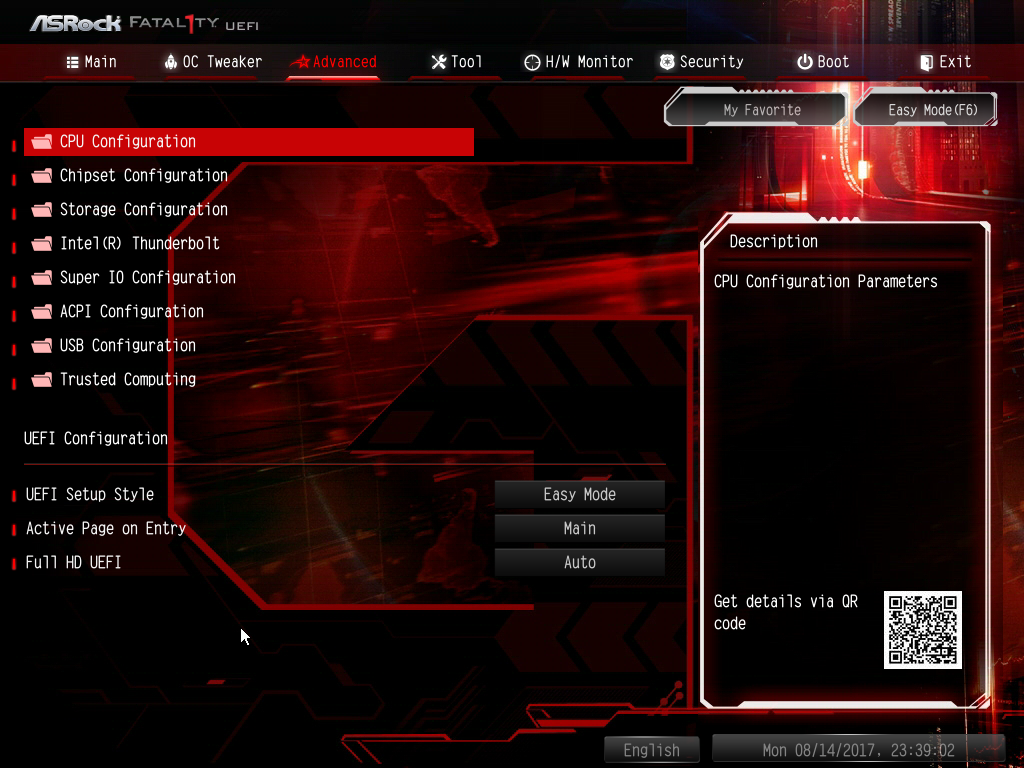
The “Chipset Configuration” submenu includes advanced options for the chipset’s link speeds and iGPU, and allows the disabling of the onboard audio and LAN devices. The rest of the submenus are straightforward, with the “Storage Configuration” including the SATA control options, the “Super I/O” the settings for the PS/2 port, etc. There is nothing out of the ordinary in any of these submenus.


41 Comments
View All Comments
GeorgeH - Tuesday, September 19, 2017 - link
100-1 something is overheating and the board is just fine.only1jv - Wednesday, September 20, 2017 - link
that's what i figured, so i tried a different GPU, same result. I even swapped the PSU, same result. Swapped the memory, same result.The only thing i haven't swapped is the CPU but i'm running the Corsair H100i AIO watercooler and have never seen temps on it go above 70c.
I figure it has to be the mobo itself because it would even lockup while in the BIOS.
Oh and yes, i already requested an RMA. Just wanted to share my experience with this mobo after seeing this review and how after a few months it's now failing on me.
Ej24 - Wednesday, September 20, 2017 - link
It was probably the VRM for delivering power to the cpu that was overheating causing the issue. There's no monitoring software for that so most people forget about it. Maybe you got some particularly hot chokes, mosfets, or caps that were just prone to overheating. At any rate, hope the RMA goes well.sonny73n - Thursday, September 21, 2017 - link
Last month I ran into the same problem but with Asus MB. Most of the time "clock_watchdog_timeout" error appeared when it froze. The weather then was about 100F in Southern Ca. CPU stock HSF replaced + case opened = problem solved.The_Assimilator - Wednesday, September 20, 2017 - link
Allow me to introduce you to this magical concept know as "RMA".lucam - Wednesday, September 20, 2017 - link
Still no iPad Pro review yet..:(Beaver M. - Wednesday, September 20, 2017 - link
I would really like to know why they removed 1 USB port at the IO panel.It was still there on the Z170 version.
Also putting in WiFi as part of the board, that cant be removed, is not a good idea either. They might have saved some space on the board, but they didnt use it (for example more USB headers), and instead wasted space on the IO panel. Some people just dont need WiFi and/or Bluetooth.
Also why doesnt AT test if the notorious ASRock USB problem with long or extended cables still exists, which could only be fixed by taking an non-Intel USB chip (either if one is on the board, or an extra PCIe card)? It has been known for at least 5 years...
DanNeely - Thursday, September 21, 2017 - link
They probably used a cheaper 1x USB3.1g2 controller. A year or two ago I don't think that budget version was available yet.bak0n - Thursday, September 21, 2017 - link
I find it odd that they release it now, when the 370's are right around to corner. A bit late to the game for my taste.mickulty - Thursday, September 21, 2017 - link
The 87350D mosfets (actually "power blocks" integrating high and low sides) are actually supplied by TI - NexFET is the range that they're from.