The Biostar X470GTN Motherboard Review: AM4 ITX Revisited
by Gavin Bonshor on October 24, 2018 10:00 AM ESTBIOS
The Biostar X470GTN Racing BIOS gets a visual overhaul over the previous X370GTN model, although both versions of Biostars GTN BIOS have very similar traits in that they are both relatively basic. The new UEFI BIOS on the X470GTN is certainly more defined in that the panels and menus flow better and look more visually appealing. The most notable improvement is the menu bar with proper descriptions as to what each menu is titled as the X370GTN relied on icons as opposed to text-based titles.
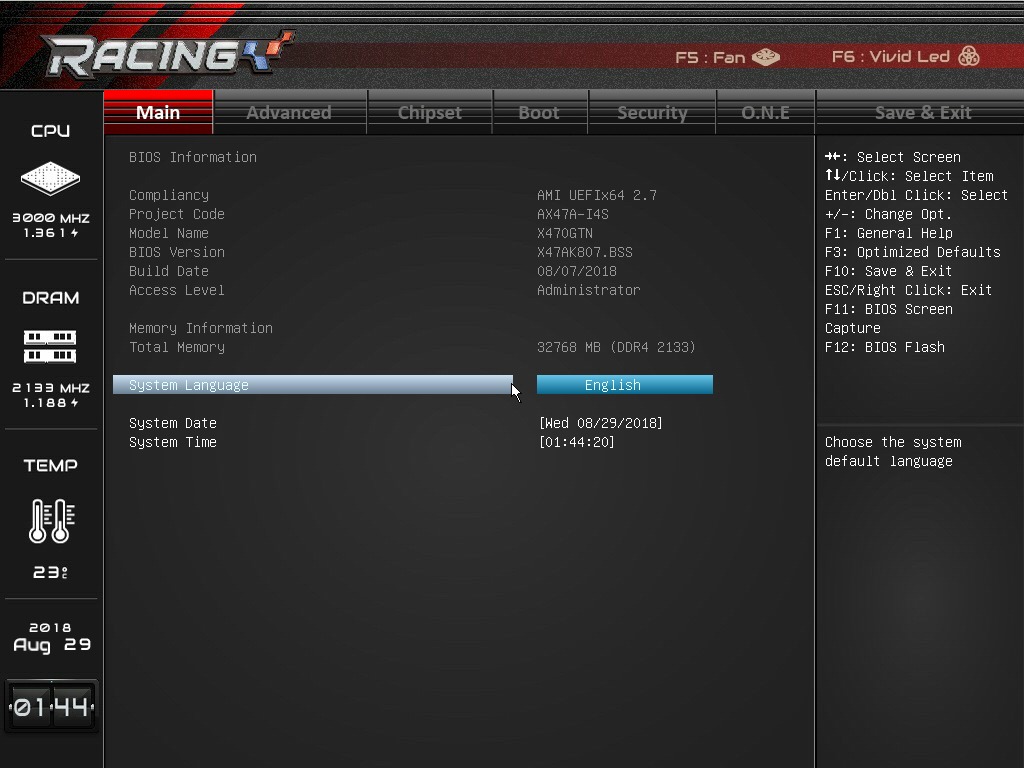
Entering the initial splash screen after pressing F2 automatically brings users to the main menu, which is a basic list of information regarding things such as the BIOS’s compliancy, the model name, the BIOS firmware version currently installed and the build date of the current BIOS version. Below this is information about the installed memory capacity, but no information on individual populated slots, nor whether the memory is operating in single or dual channel is noted. On the left-hand side of the screen is a panel going from top to bottom listing information relating to processor speed, memory speed, current system temperature in real-time from the onboard temperature sensor and the current date and time.

The advanced menu allows users to change some of the more complex settings such as security settings within Trusted Computing and enable, or disable ErP and configure power-related settings. The SATA configuration setting allows for the onboard SATA controller to be enabled or disabled, as well a basic hardware monitor which consists of a basic list of readouts ranging from CPU temperature, the system monitoring sensor temperature, as well as CPU fan speed and current voltages. The more comprehensive set of customizable DDR4 memory options can also be found here such as enabling ECC support (set to automatic by default) which Biostar doesn’t actually state if ECC is actually supported within their manual or limited QVL supported listing.
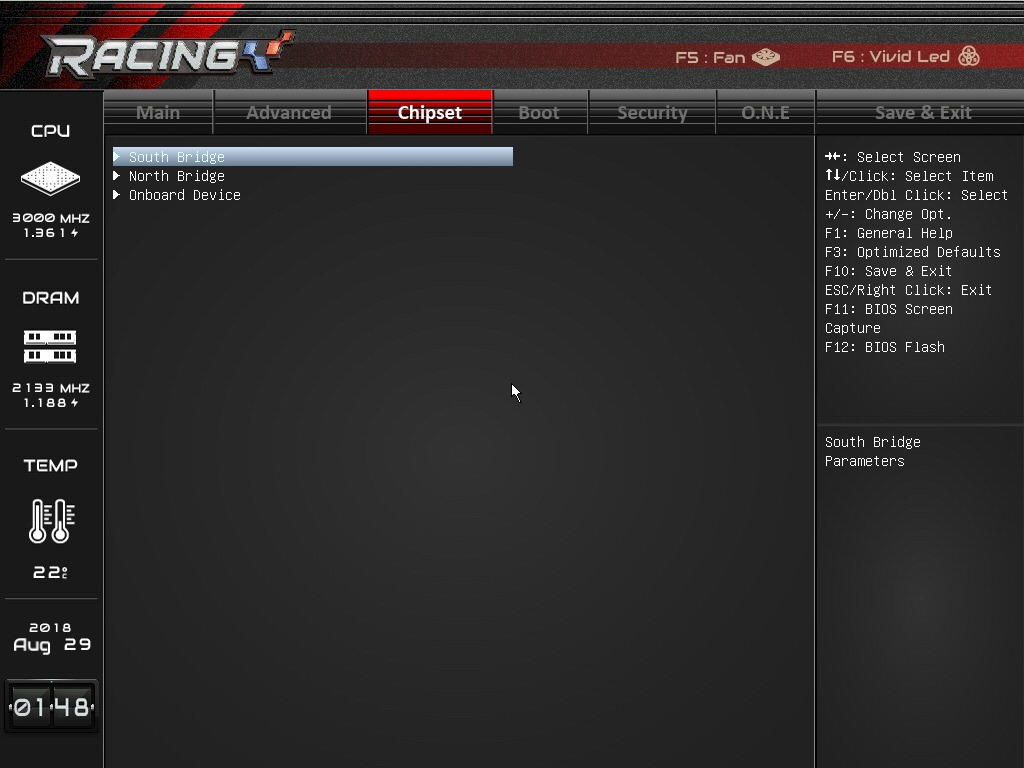
In the chipset menu, users can enable or disable the various controllers on the board.
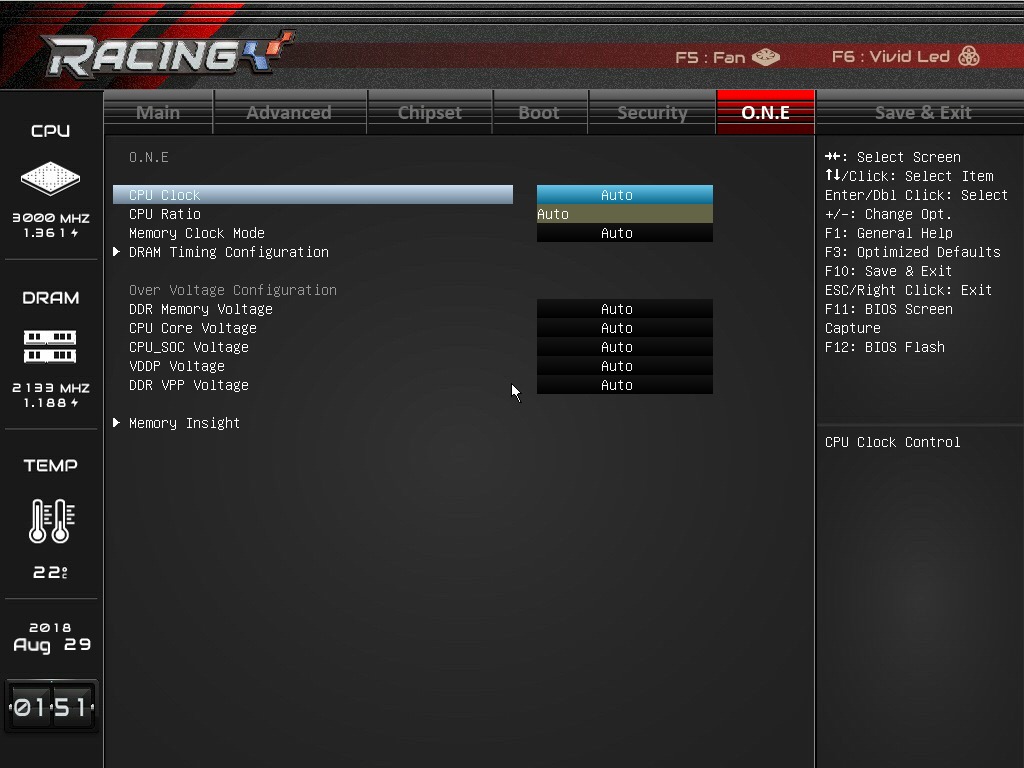
The O.N.E area contains options required to overclock processors, but just like with the BIOS found on the X370GTN motherboard, there were a few areas that could be improved upon. The CPU settings allow for multipliers such as x34 for 3.4 GHz and x42 for 4.2 GHz as would be expected, but the CPU core voltage works from voltage offsets as opposed to set values. This would be acceptable to work from, but there are no indications of what the base voltages actually are so inexperienced users could quite easily be left scratching their heads in dismay. This method is very primitive and not attractive to even the most experienced users as it requires extra guesswork involved when the process could and should be relatively straightforward. This makes it doubly worse for anyone trying liquid nitrogen overclocking.
The BIOS didn’t let us take any screenshots with any of the dropdown menus selected which was slightly disappointing, but selecting the Memory Clock Mode opens up the ability to set the installed RAMs X.M.P memory profile, or select from a range of memory frequency dividers which ranges from DDR4-1333 all the way to DDR4-4200 which is far beyond the maximum supported speeds on the box.
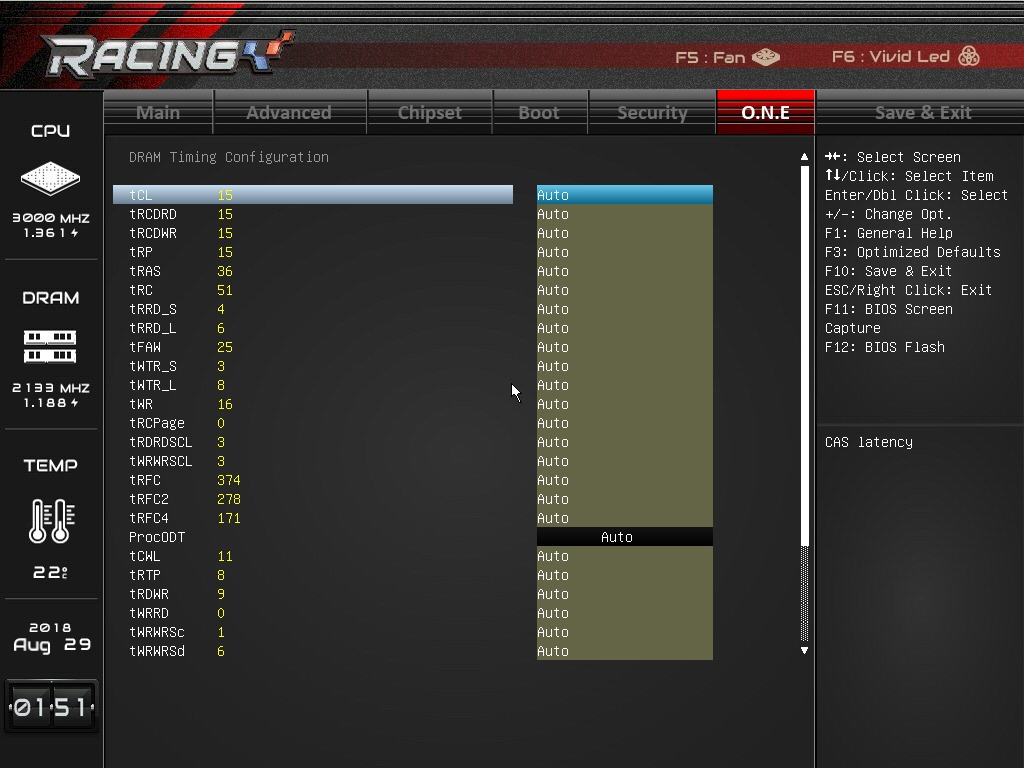
While not as clean and crisp as some other vendors BIOS implementations, the overclocking settings do seem to work well when set within acceptable variables and users looking to make more comprehensive memory customizations can even set a variety of sub-timings in the DRAM Timing Configuration menu.
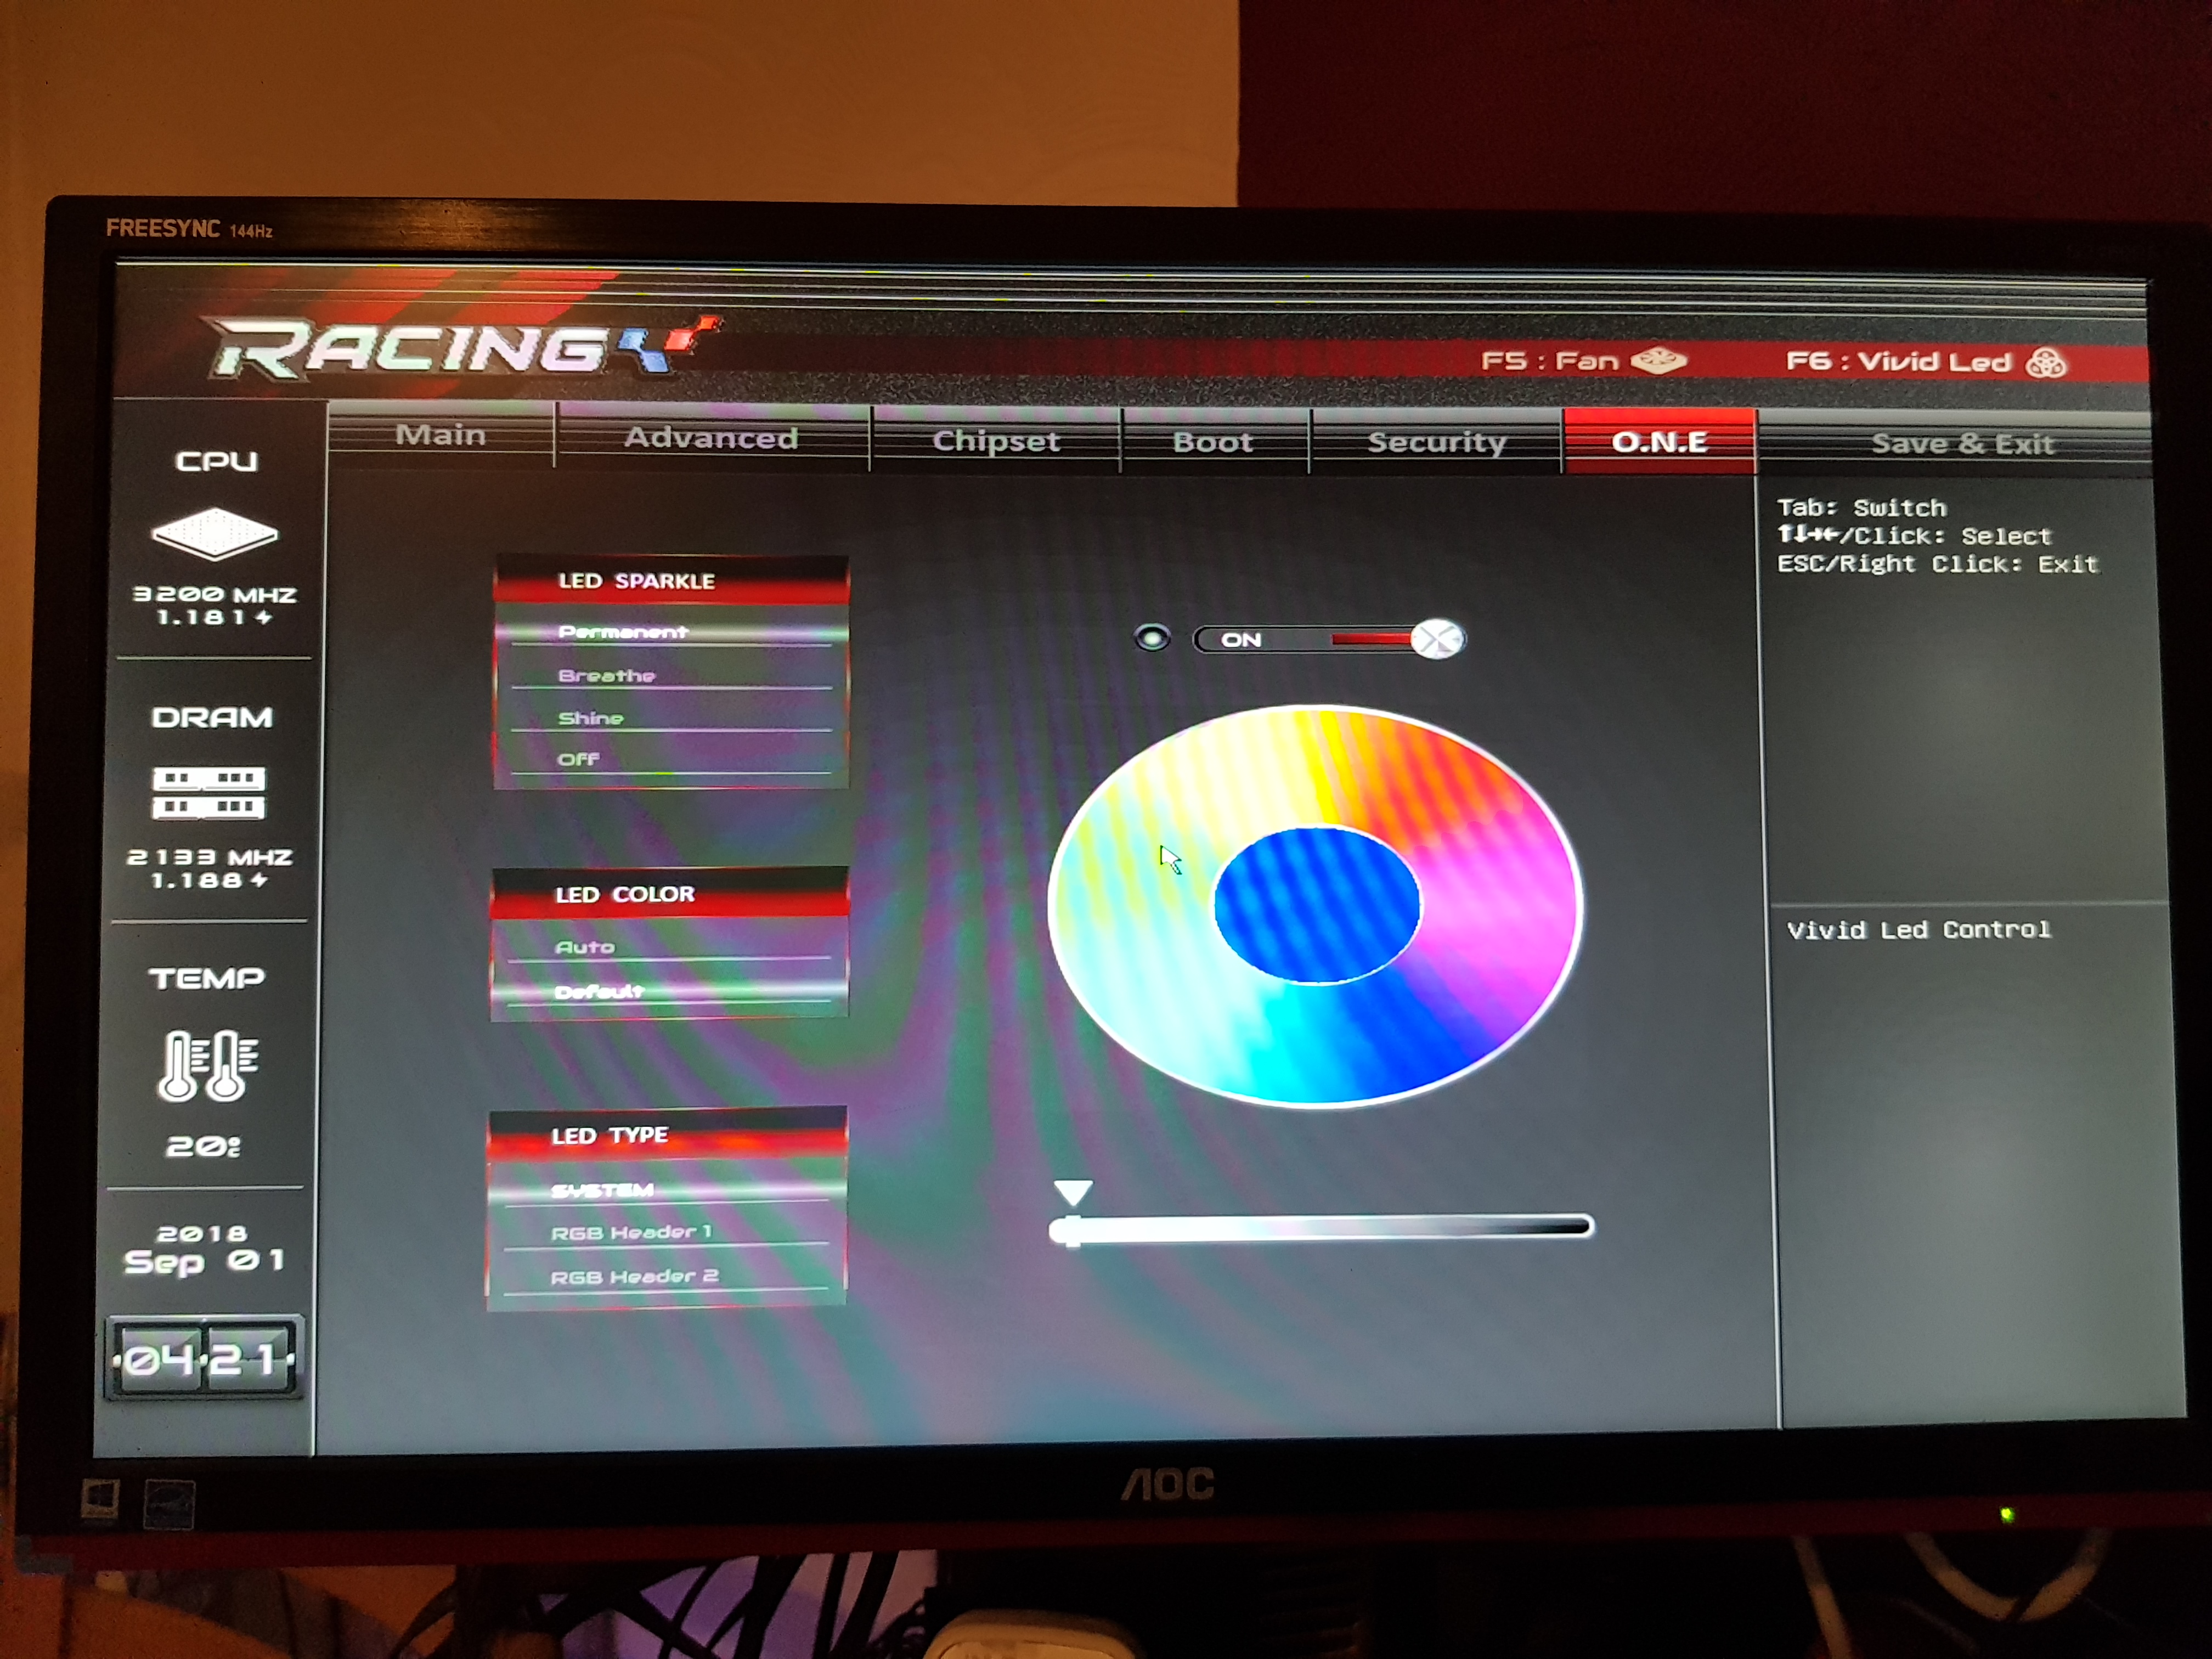
Another annoyance within the BIOS was the inability to take screenshots of the Vivid LED screen and the Fan customization panel; the Vivid LED screen can be accessed by pressing F6 within the BIOS. The Vivid LED options and panel on the X470GTN is a very noticeable improvement over the one included with the X370GTN as the new screen includes a selectable color wheel which replaces the older style and archaic numerical based RGB options. Users can select between three different lighting modes as well as having the ability to turn them off completely. Users can also customize the colors of the two RGB 5050 headers the board features which is a nice feature to have, but there are no options within the BIOS to sync across the three available areas which is a rather unfortunate area to neglect in today's RGB crazed market.
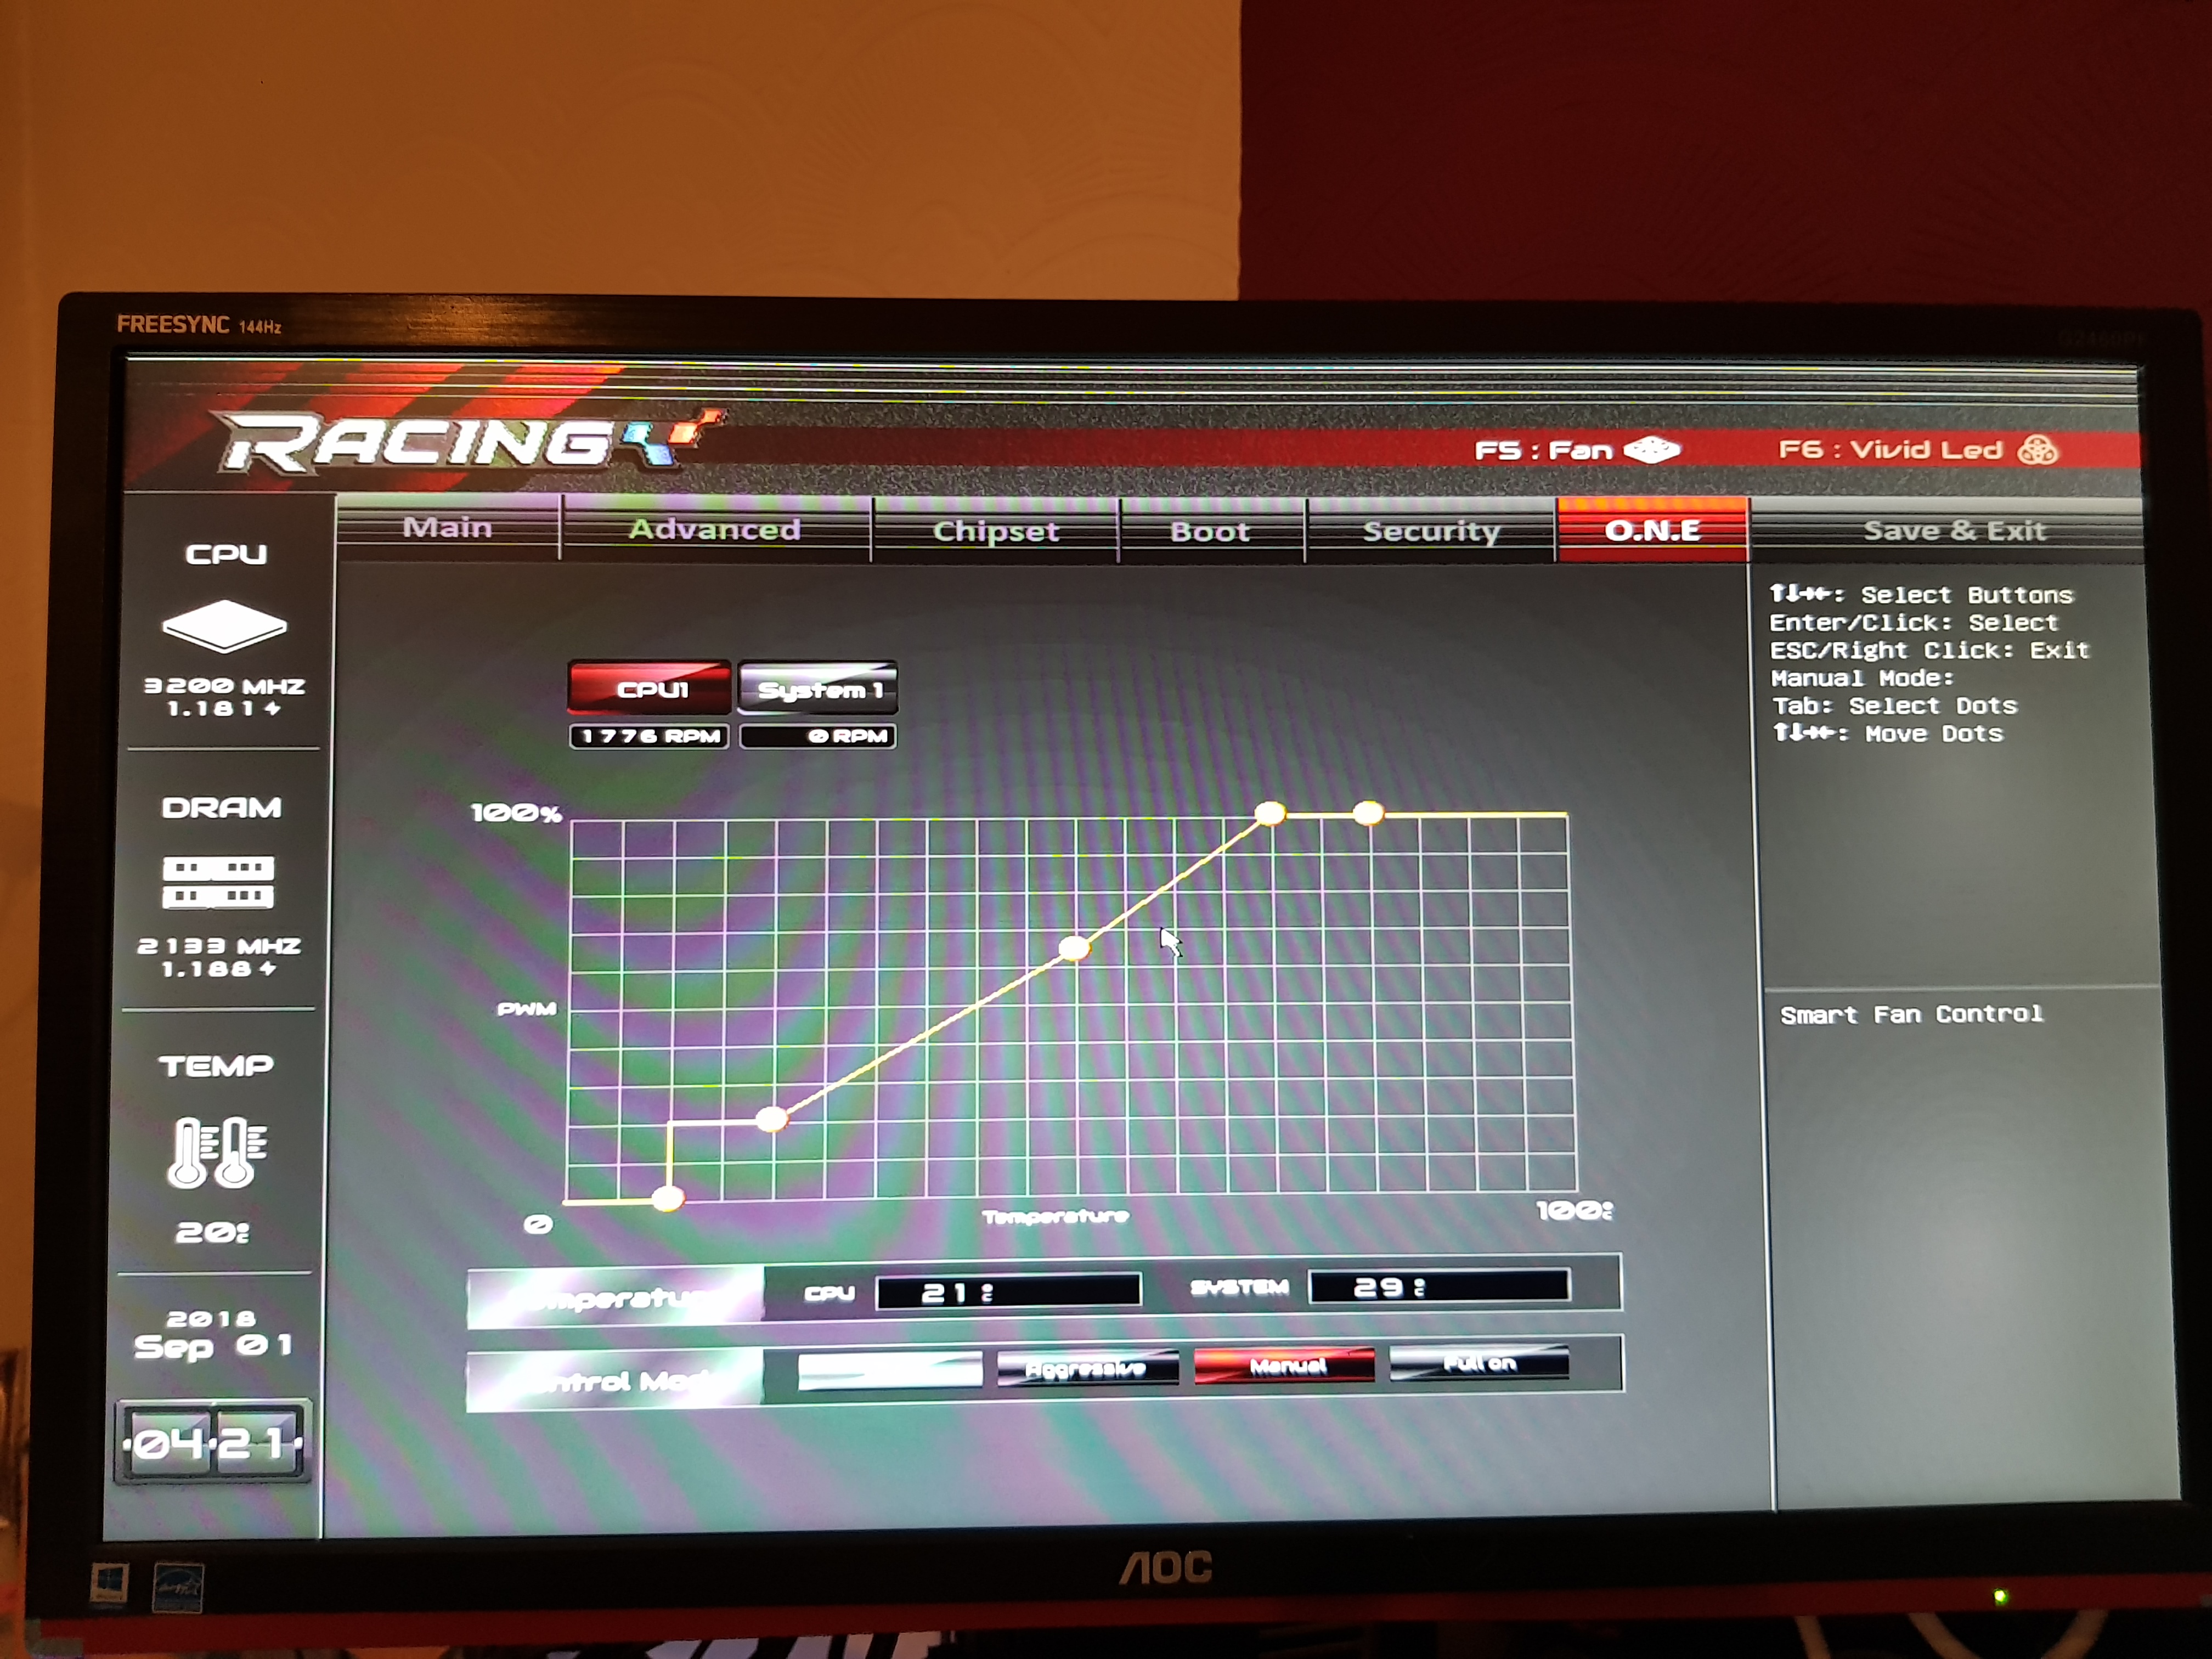
The fan customization screen can be accessed by pressing F5 and allows users to select between four different settings which include quiet, aggressive, manual and full on. With the manual control mode selected, users can set their own custom curve profile with five different points of customization available. The board has a total of two headers including one for the CPU and another for a system fan, which is very basic and there is nowhere in the BIOS to select between DC or PWM mode, giving the indication that what you see is what you get, unfortunately.
_thumb.jpg)
_thumb.jpg)
_thumb.jpg)
_thumb.jpg)
_thumb.jpg)
_thumb.jpg)
While the BIOS on the newer X470GTN motherboard in comparison to the previous X370GTN model is a clear improvement, some areas which did require some work haven’t been addressed, whereas other areas such as the LED section have been improved. The BIOS does look newer on this model in contrast to the X370GTN, but unfortunately, it’s still a little antiquated and efforts to improve the usability hasn’t been done to levels expected. The Vivid LED options are certainly notable and I applaud Biostar for including usable settings for novice users, but the overclocking options are still very outmoded in comparison to the other big four vendors and while a clear aim of Biostar has been to create a BIOS similar in style to the other manufacturers, more focus should have been paid towards developing a better overclocking system with set variables.
Software
The software package supplied with the X470GTN is far from extensive, but just like the company has done with the BIOS, Biostar has looked to improve upon what it already has. The more prominent of the utilities is the Biostar Racing GT Software which has had a major visual overhaul. Also included is the Biostar BIOS Screen Updater, the Biostar BIOS Update software and a generic Realtek HD audio manager utility.
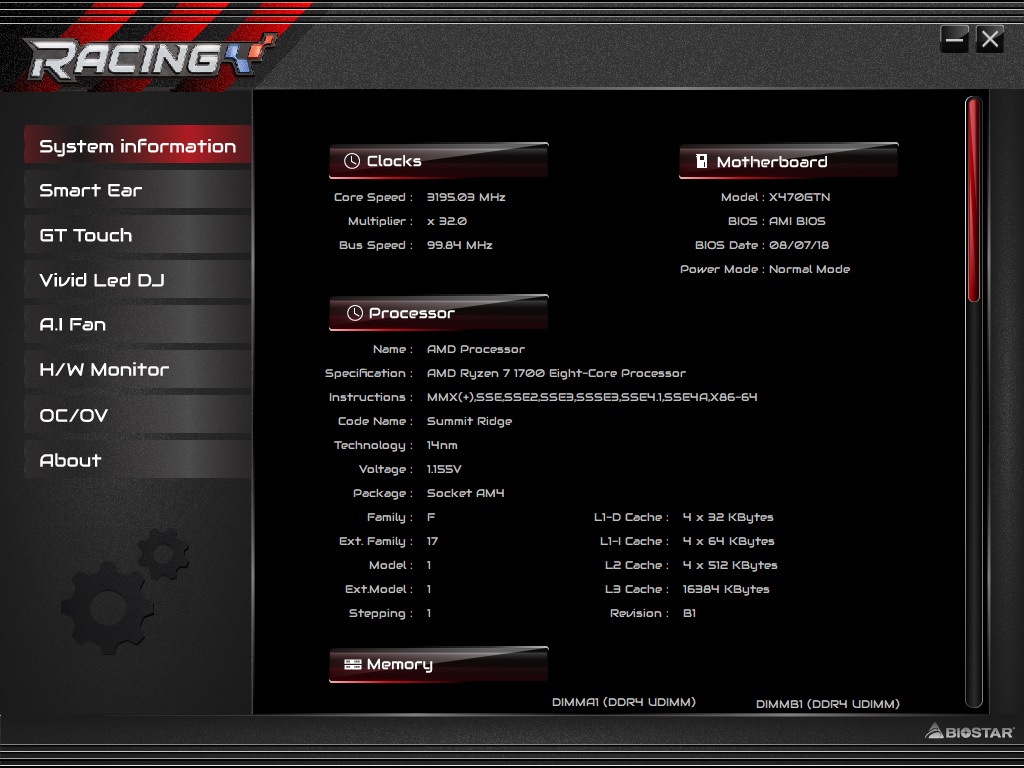
The Biostar Racing GT software offers users a variety of different functions and features in one basic but visually pleasing place. The different menus include System Information are self explanatory, such as information relating to currently installed hardware such as the processor, memory and lists current CPU core speed, memory speed, memory timings and even the installed firmware version. The Smart Ear menu allows users to increase or decrease volume, just like the volume control within the Windows Task Bar which seems pointless, but it’s basically this but with a fancy looking GUI. GT Touch is a little different and allows users to select between three different system states, Normal which is essentially a balanced mode, Eco which is designed to be more power conscientious and the sport mode which Biostar states to provide the highest level of system performance.
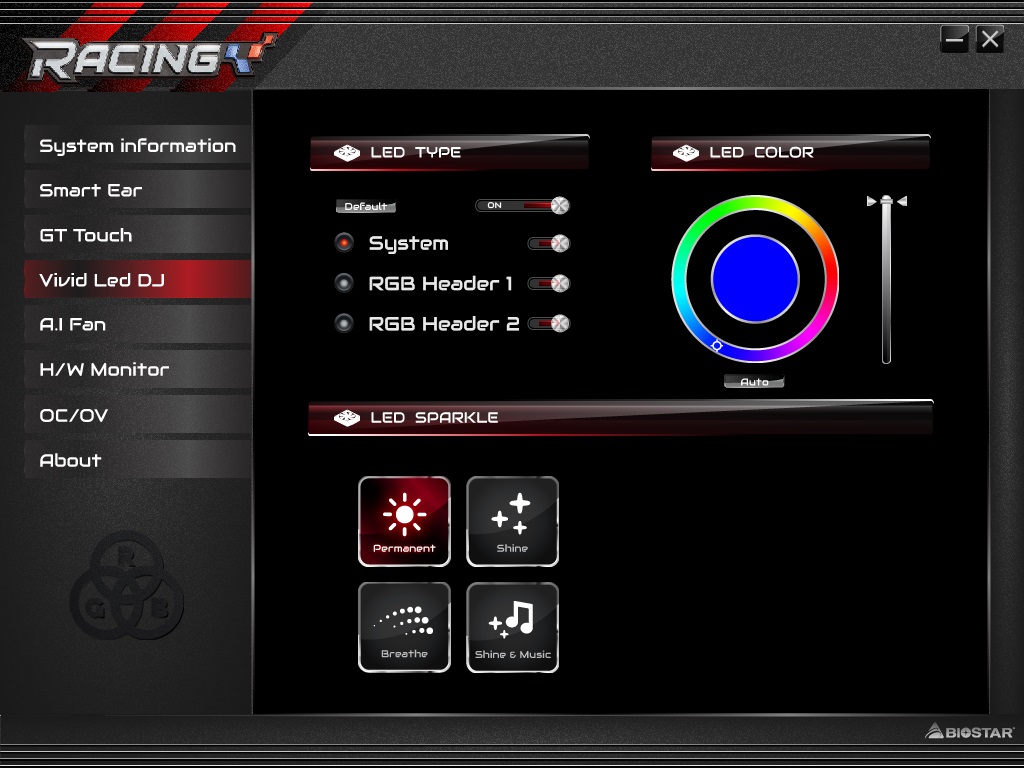
Just as within the Vivid LED DJ section in the BIOS, the Racing GT software also allows RGB customization within the operating system. The BIOS screen sort of mirrors the software with the options to select between the three different lighting modes across three different zones, with the ability to turn off the LEDs completely at the touch of a button. Just as with the BIOS, there is no option to sync the effects and colors across all three available areas of customization which again, is disappointing to see given the maturity of RGB over the last couple of years.
The OC/OV section stands for Overclocking and Overvolting with options here available for overclocking within Windows. Software from the other big vendors offer much more customization than Biostar as the only option available for change in the OC section is the CPU ratio limit which goes up and down in 100 MHz increments. The OV section allows for the adjustment of a variety of voltages including CPU Core Voltage, DDR Memory Voltage and even CPU SoC Voltage which is paramount for overclocking the Ryzen based APUs.


18 Comments
View All Comments
Stuka87 - Wednesday, October 24, 2018 - link
Just about every motherboard out offers a fast boot mode. My 4 year old desktop goes from power button being pushed to windows login screen in 6 seconds. My new laptop is pretty similar, and thats with Dell's bloated UEFI.lightningz71 - Wednesday, October 24, 2018 - link
Please, on ITX boards, can you conduct testing with a RYZEN 2400G? These are great boards for doing reasonable cost home entertainment and SFF builds with, and that's a solid use case for the 2400G. Testing the SOC VRMs for their comparive ability to support iGPU overclocks on those APUs would be invaluable.jeremyshaw - Wednesday, October 24, 2018 - link
Raven Ridge unified the CPU and GPU voltage rail.gavbon - Wednesday, October 24, 2018 - link
I can see where you are coming from, but our AM4 test bench is designed to test the motherboards on an even playing field with the same hardware. While users might consider the X470GTN as perfect for the 2400G, even I think it's suited, not every board has video outputs to test.jensend - Thursday, October 25, 2018 - link
No DisplayPort = instant disqualification. There's no excuse for this any more.Review sites should just send mobos that don't include DP back to the manufacturer or toss them in the trash bin. Send the message that it's not acceptable in 2018.
Many ITX builds would benefit hugely from inexpensive and low-TDP graphics. Raven Ridge provides reasonable graphics power especially if used with adaptive sync. Cheap FreeSync monitors are plentiful but generally can only do FreeSync over DP not the FreeSync-over-HDMI proprietary hack. DisplayPort is royalty-free.
A motherboard without displayport messes seriously with AMD's value propositions in the SFF space. Boards with DP should not be this scarce a full dozen years after DP's introduction.
PC Crazy - Thursday, October 25, 2018 - link
Awesome review. To be honest, it doesn't need some extra special features which would pump up the price. As you wrote, this is a solid board for a nice price that can do a good OC and people with tighter budget can create a small but brilliant gaming machine. In any case, thanks for the review. Just what I needed if someone asked me for an AM4 miniITX build and what board to choose.artifex - Monday, October 29, 2018 - link
"The question could be asked why Biostar went with the X470 chipset over the B450 chipset as there are no specific X470 features that this board would benefit from over B450 due to the mini-ITX form factor, but from a marketing point of view, X470 comes across as a higher end chipset and from this aspect, it would make a lot of sense."And that's the real question for me, not how it's better than the x370 version. Your B450 roundup says the ASRock B450 Gaming-ITX/ac and ASUS ROG Strix B450-I Gaming each have a better audio codec (Realtek ALC1220), better NIC (Intel 1211AT), and Wi-Fi with bluetooth. The ASRock supports 3466+ speeds as opposed to this board's 3200+, has HDMI 2.0 and DP 1.2 as opposed to HDMI 1.4 and a DVI-D port, and the same number of SATA ports, the same number/style of 10 Gbps USB 3.1 slots. From the ASRock article it looks like this board does offer twice the 5Gbps USB 3.0 ports on the back panel, and 2 USB 2.0s on the back panel where the ASRock just has headers for the USB 2.0. The ASRock also has an 8-pin CPU power connector, not 4, and an extra system fan header. And you show it for the same MSRP of $130. The ASUS ROG I don't see a separate article for, but the roundup mentions an AIO connector and a bunch of blinky lights I don't care about and is probably way more expensive, but still: what makes this 470 board better than those two B450 ITX boards? Some extra USB ports on the back and DPC latency?
Brane2 - Tuesday, October 30, 2018 - link
Another "meh" model.When will finally someone present ITX board utilizing graphic output to the maximum ?
AM4 APUs have 4 graphic channel outputs.
Gimme an ITX board with 3 or better yet 4 DP outputs and I'll imediately purchase couple.
Funny enough, even FM2+ socket boards have had models with better video output options....
Now that we have VERY decent APU with all that RAM bandwidth, 4 CPU kickass cores, 11 GPU cores and L3 cache, and above all with Ryzen 2 at the doors, and NO ITX board that would be able to give all that hardware to show all its potential...