Memory Scaling on Haswell CPU, IGP and dGPU: DDR3-1333 to DDR3-3000 Tested with G.Skill
by Ian Cutress on September 26, 2013 4:00 PM ESTEnabling XMP with ASUS, GIGABYTE, ASRock and MSI on Z87
By default, memory should adhere to specifications set by JEDEC (formerly known as the Joint Electron Device Engineering Council). These specifications state what information should be stored in the memory EEPROM, such as manufacturer information, serial number, and other useful information. Part of this are the memory specifications for standard memory speeds, including (for DDR3) 1066 MHz, 1333 MHz and 1600 MHz, which a system will adhere to in the event of other information not being available.
An XMP, or (Intel-developed) Extreme Memory Profile, is an additional set of values stored in the EEPROM which can be detected by SPD in the BIOS. Most DRAM has space for two additional SPD profiles, sometimes referred to as an ‘enthusiast’ and an ‘extreme’ profile; however most consumer oriented modules may only have one XMP profile. The XMP profile is typically the one advertised on the memory kit – if the capability of the memory deviates in any way from specified JEDEC timings, a manufacturer must use an XMP profile.
Thus it is important that the user enables XMP! It is not plug and play!
At big computing events and gaming LANs there are plenty of enthusiasts who boast about buying the best hardware for their system. If you ask what memory they are running, then actually probe the system (by using CPU-Z), I sometimes find that the user, after buying expensive memory, has not enabled XMP! It sounds like a joke story, but this happened several times at my last iSeries LAN in the UK – people boasting about high performance memory, but because they did not enable it in the BIOS, were still running at DDR3-1333 MHz C9.
So enable XMP with your memory!
Here is how:
Step 1: Enter the BIOS
This is typically done by pressing DEL or F2 during POST/startup. Users who have enabled fast booting under Windows 8 will have to use vendor software to enable ‘Go2BIOS’ or a similar feature.
Step 2: Enable XMP
Depending on your motherboard manufacturer, this will be different. I have taken images from the major four motherboard manufacturers to show where the setting is on some of the latest Z87 motherboard models.
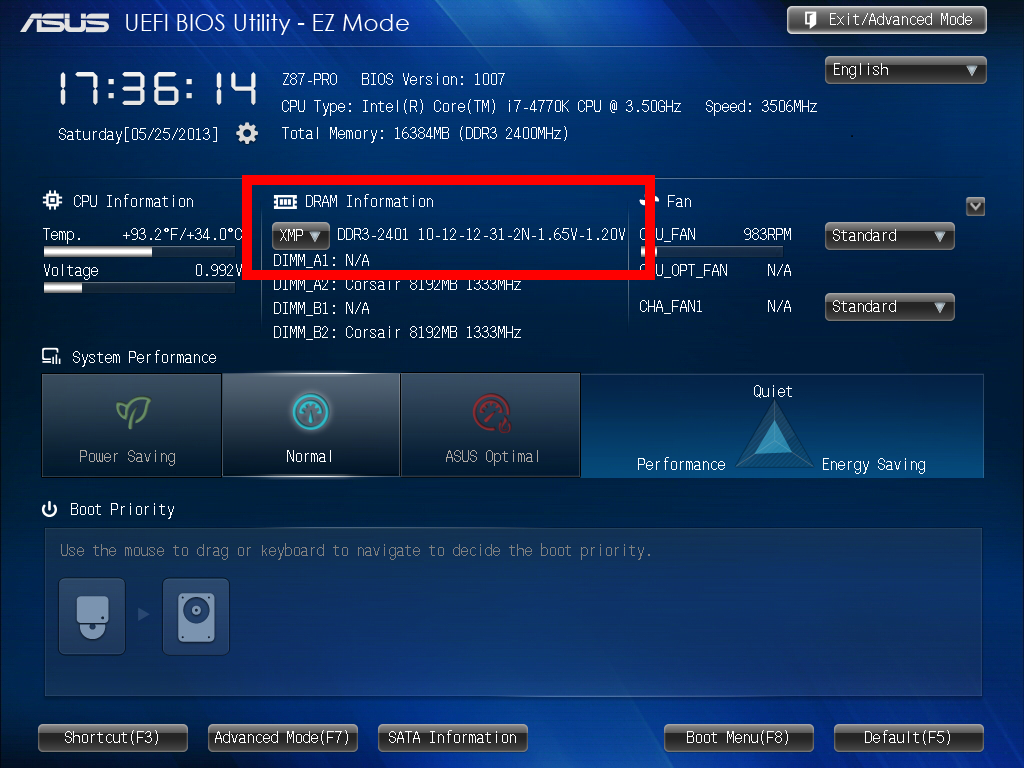
On the ASUS Z87-Pro, the setting is on the EZ-Mode screen. Where it says ‘XMP’ in the middle, click on this button and navigate to ‘Profile 1’:
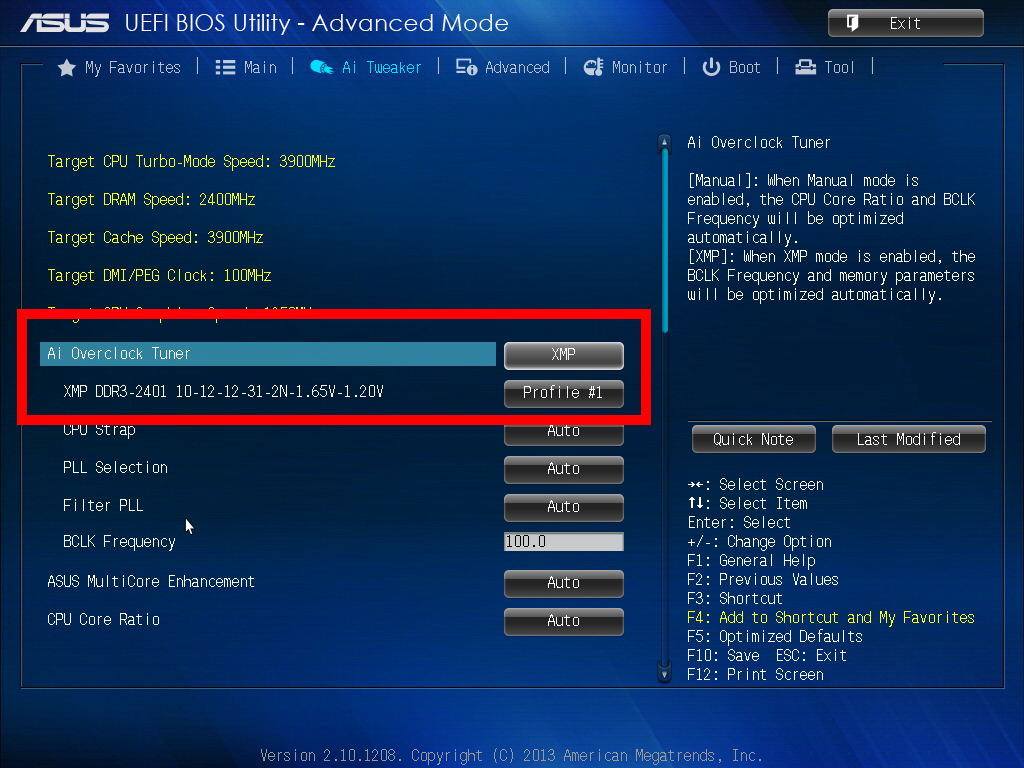
If you do not get an EZ mode (some ROG boards go straight to advanced mode), then the option is under the AI Tweaker tab, in the AI Overclock Tuner option.
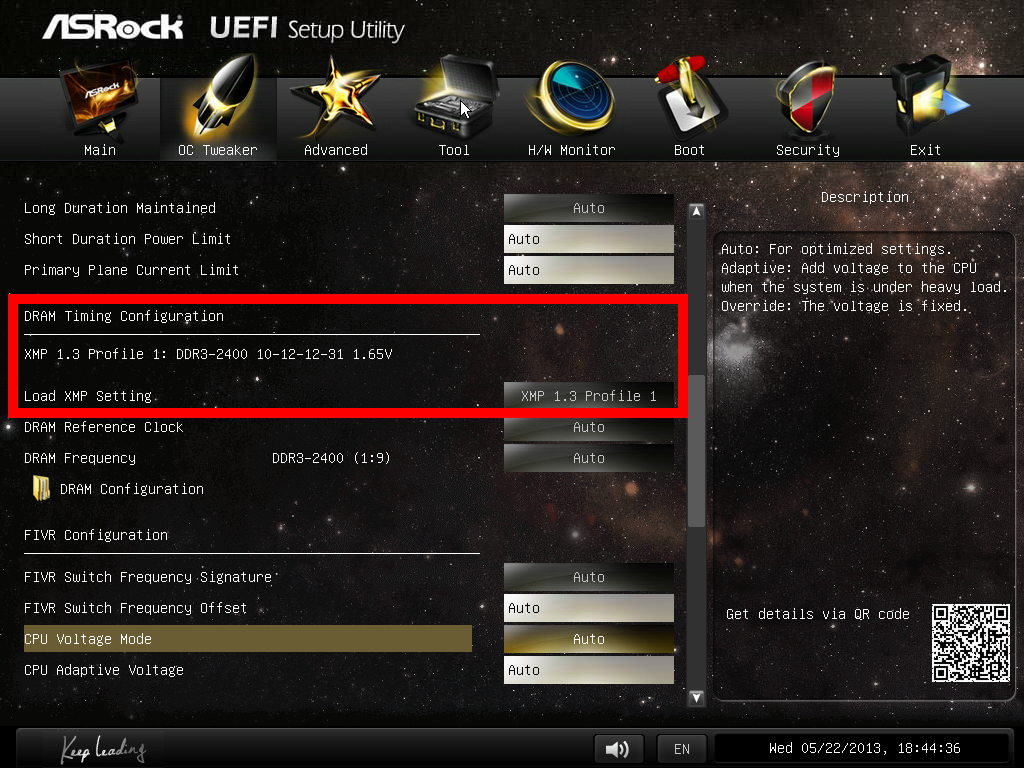
For ASRock motherboards, navigate to OC Tweaker and scroll down to the DRAM Timing Configuration. Adjust the ‘Load XMP Setting’ option to Profile 1.
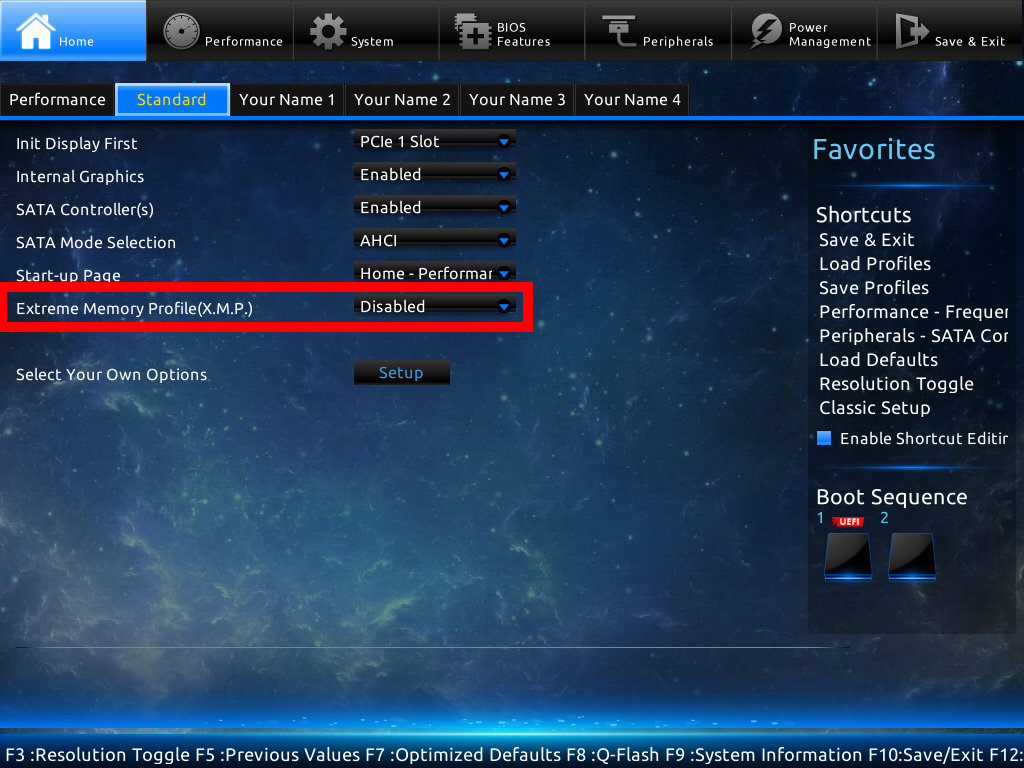
For GIGABYTE motherboards, such as the Z87X-UD3H in the new HD mode, under Home -> Standard is the separate XMP setting, as shown below:
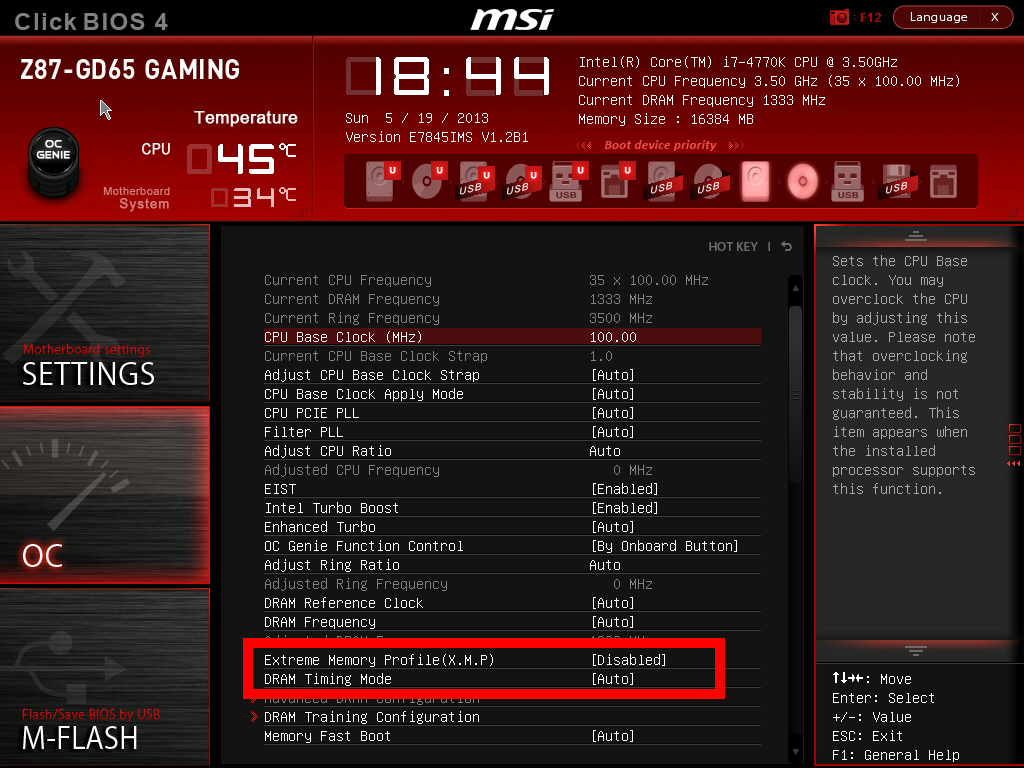
Finally on MSI motherboards, select to the OC option on the left hand side and XMP should be in front of you:
I understand that setting XMP may seem trivial to most of AnandTech’s regular readers, however for completeness (and the lack of XMP being enabled at events it seems) I wanted to include this mini-guide. Of course different BIOS versions on different motherboards may have moved the options around a little – either head to enthusiast forums, or if it is a motherboard I have reviewed, I post up all the screenshots of the BIOS I tested with as a guide.


89 Comments
View All Comments
gsuburban - Thursday, November 28, 2013 - link
Interesting article however, "Number of Sticks" as noted above would mean what? Is there a performance gain or loss using the same amount of Gigs of the same RAM in say 16GB in two dims versus 16GB of the same using 4 dimms?neal.a.nelson - Sunday, December 8, 2013 - link
That is a reasonable inference, and given the age of the article and date of the last post, probably all you're going to get. For upgrade ability, it's smart to use the two dual-channel slots instead of filling all four with the same amount.htwingnut - Monday, January 20, 2014 - link
Thanks for this testing and article. This shows 1366x768 for resolution. While I understand that this will test the RAM fully, it's also not realistic. I'd like to see results running single 1080p or 3x1080p because that's more real world.melk - Thursday, January 23, 2014 - link
Am I reading this correctly? That there is literally a 1fps difference at best, in both lowest and avg fps?melk - Thursday, January 23, 2014 - link
So we are talking about a ~1 fps difference in real world testing? Wow...dasa43 - Friday, February 28, 2014 - link
To see gains from faster ram the game needs to be cpu limited while most console ports are totally gpu limitedIncreasing resolution just stresses the gpu more further lightning the load on the cpu
Thief & Arma are two cpu limited games that can see big gains from faster ram
Thief benchmarks
http://forums.atomicmpc.com.au/index.php?showtopic...
Arma benchmarks
http://forums.bistudio.com/showthread.php?166512-A...
NordRack2 - Sunday, June 1, 2014 - link
Quote: "Using the older version of WinRAR shows a 31% advantage moving from 1333 C9 to 3000 C12"That's wrongly calculated.
Correct is: ((213.63-163.11)/213.63) × 100% = 24%
cadman777 - Sunday, April 19, 2015 - link
Dear Sir,Do you have an article that explains the basics for RAM, CPU & m/b matching?
I want to learn the basics on this, but all I keep finding are articles like this with bits and pieces, and general explanations of the various components, but no pragmatic explanations on how they work together and how to match them and do the over-clocking between the various components to arrive at a stable system.
Thanx ... Chris
Nickolai - Sunday, August 13, 2017 - link
Is there a similar article for DDR4?