Synology DS414j: An Ideal Backup NAS
by Ganesh T S on July 10, 2014 9:00 AM ESTHardware Platform & Usage Impressions
The industrial design of almost all Synology NAS models strike the perfect balance between form and function. The hot-swap bays are easily accessible, the drive bay mechanism works great and the cooling system ensures adequate ventilation for the hard drives. Synology's j-series, however, doesn't support hot-swapping the disks in the specifications (mainly as a feature to cut down and a way to differentiate between the j- and the non-j models). In order to 'enforce' this, the disks had to be placed in a manner such that the user wouldn't accidentally remove / replace / hot-swap one of the disks. This is one of the primary reasons for the chassis design of the j-series being quite different.
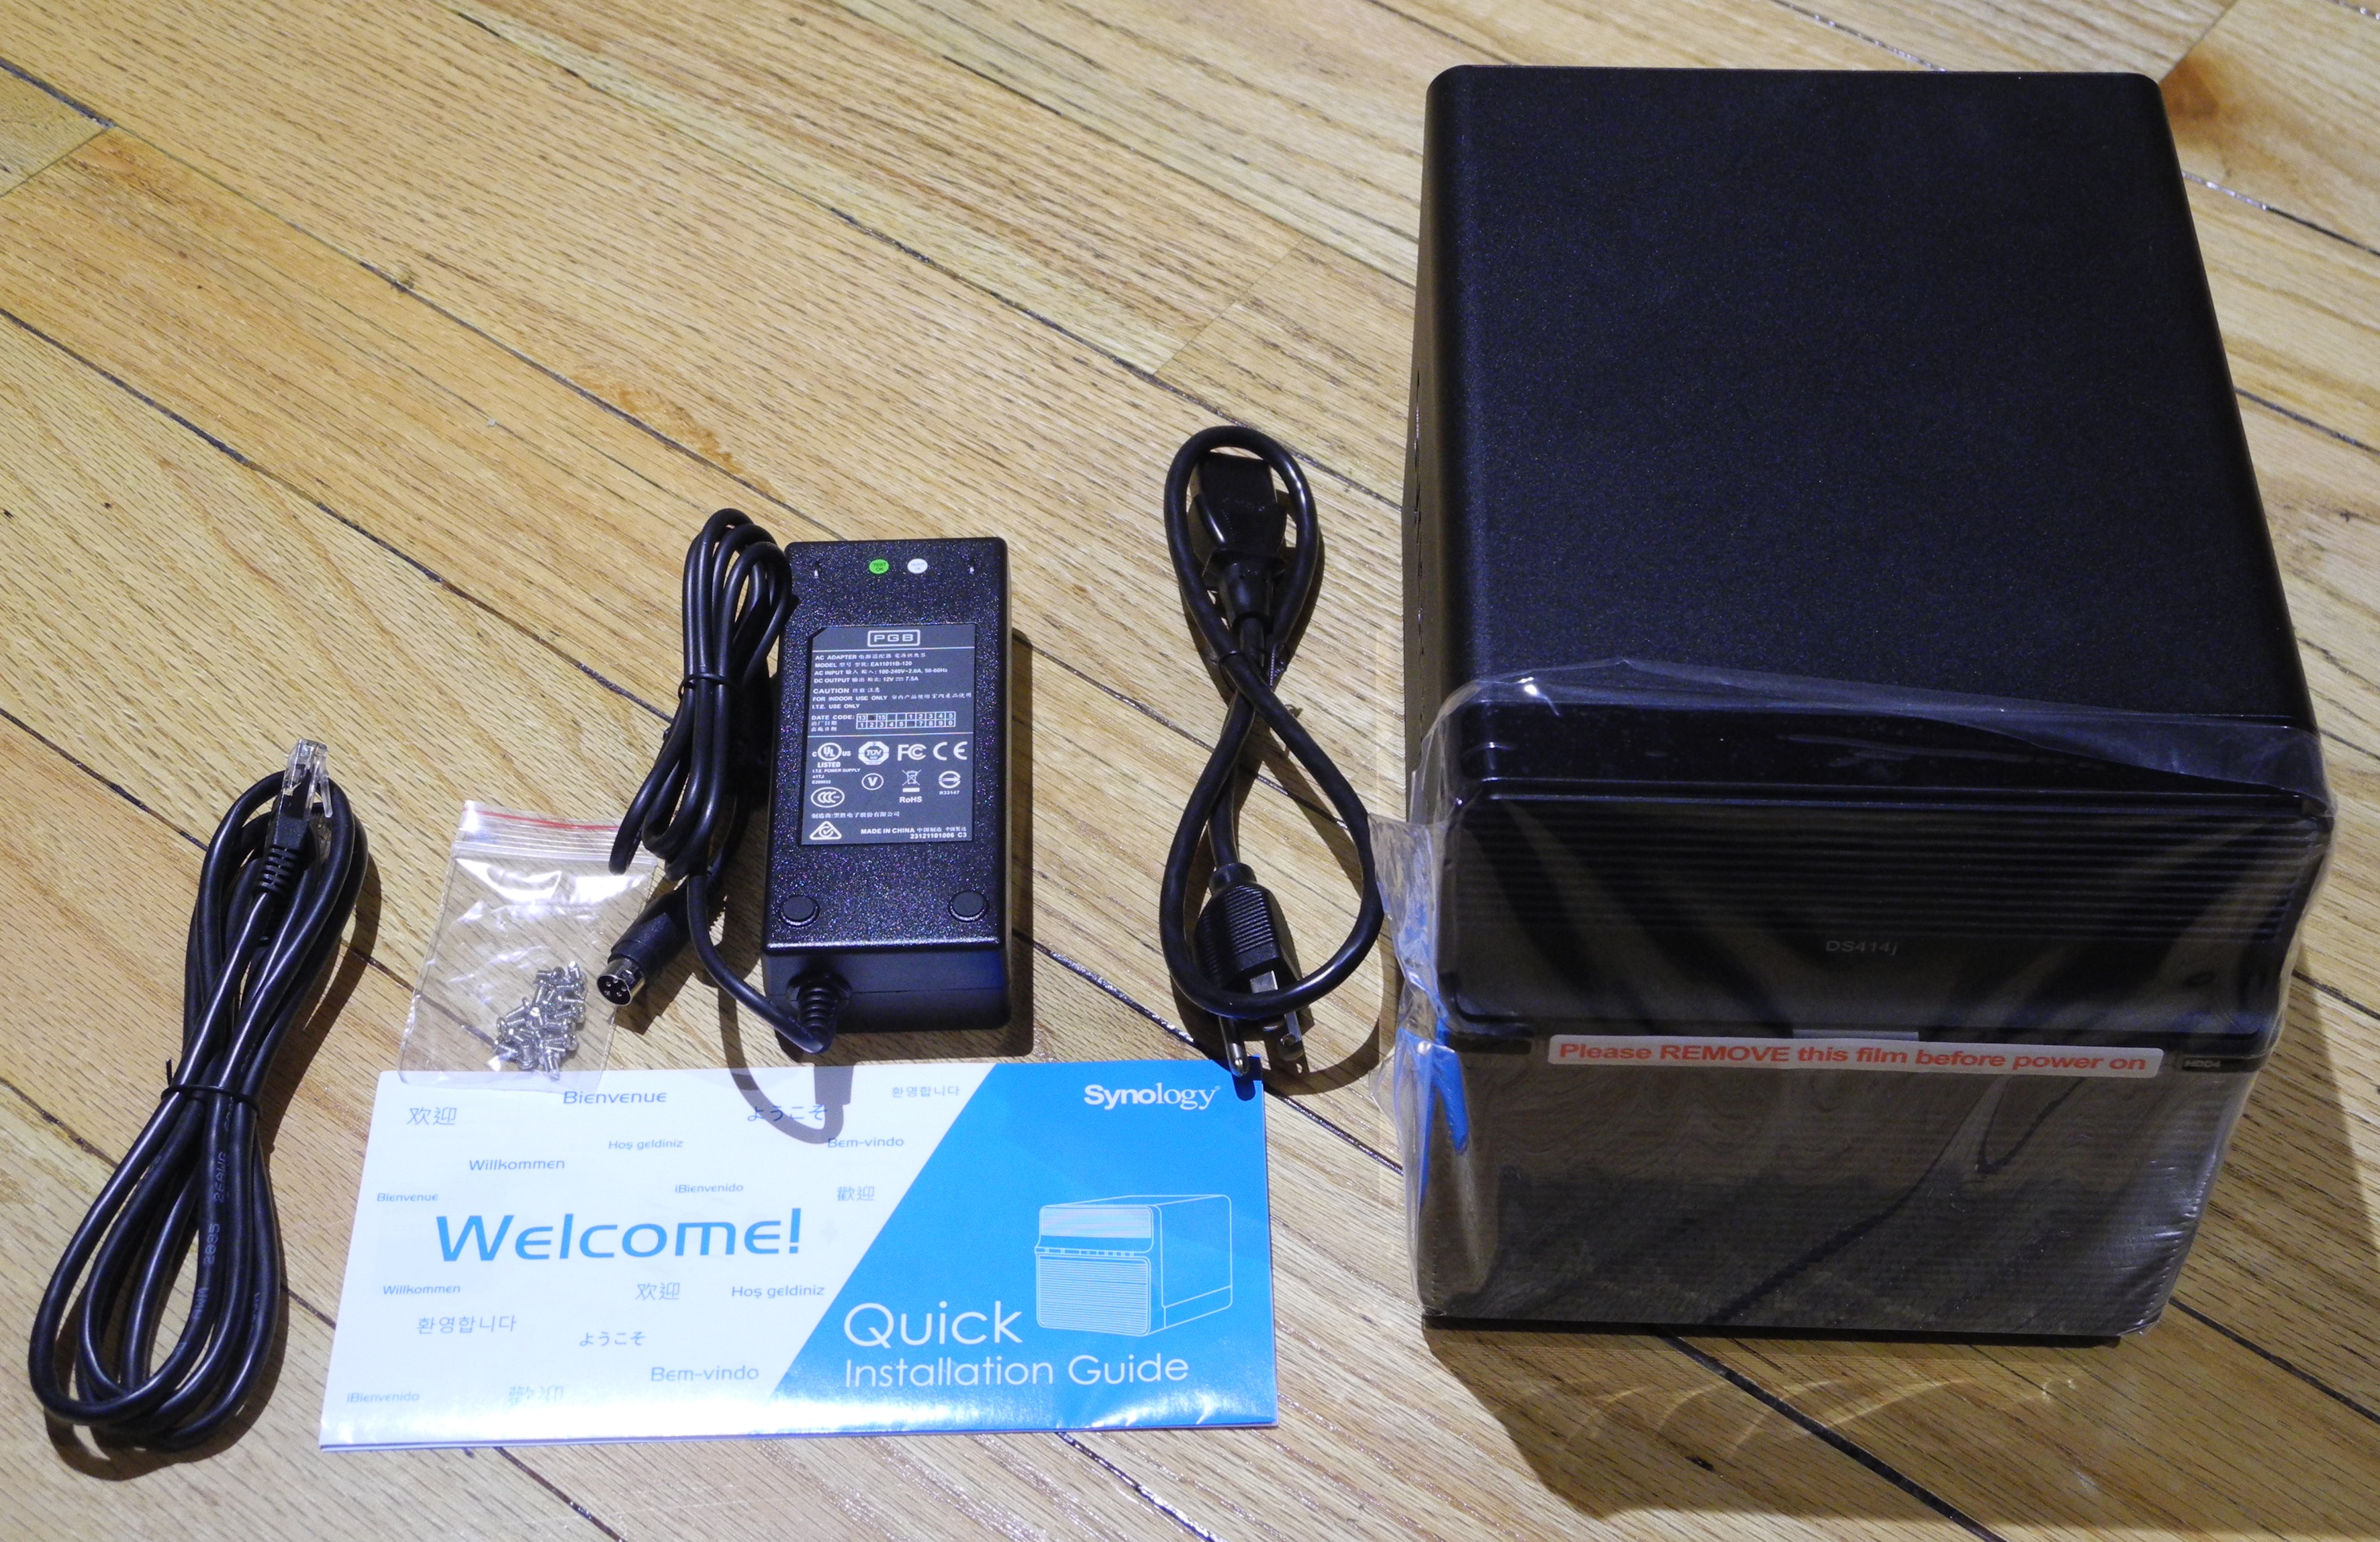
The contents of the DS414j package are provided below:
- Synology DS414j chassis
- 2M Cat 5E Ethernet cable
- 90 W (12V @ 7.5A) external power supply with US power cord
- Getting Started guide
- Screws for hard disk installation
The main chassis looks like an antique box. While some tend to like the design, others prefer the simple and elegant traditional box with easily accessible drive bays on the front side. On the rear side of the unit, we have four screws which can be easily removed to bring down the hinged plate on which the fan is mounted. This exposes the motherboard at the bottom and the metal housing for the drives. Synology makes hot-swap virtually impossible by having mounting screws on the metal housing in addition to the screws for the plastic drive trays.


Platform Analysis
On the motherboard side of things, we can see the Mindspeed Comcerto 2000 SoC right in the middle with no heat sink. Towards the bottom left, we have a Marvell 88SX7042 SATA controller.
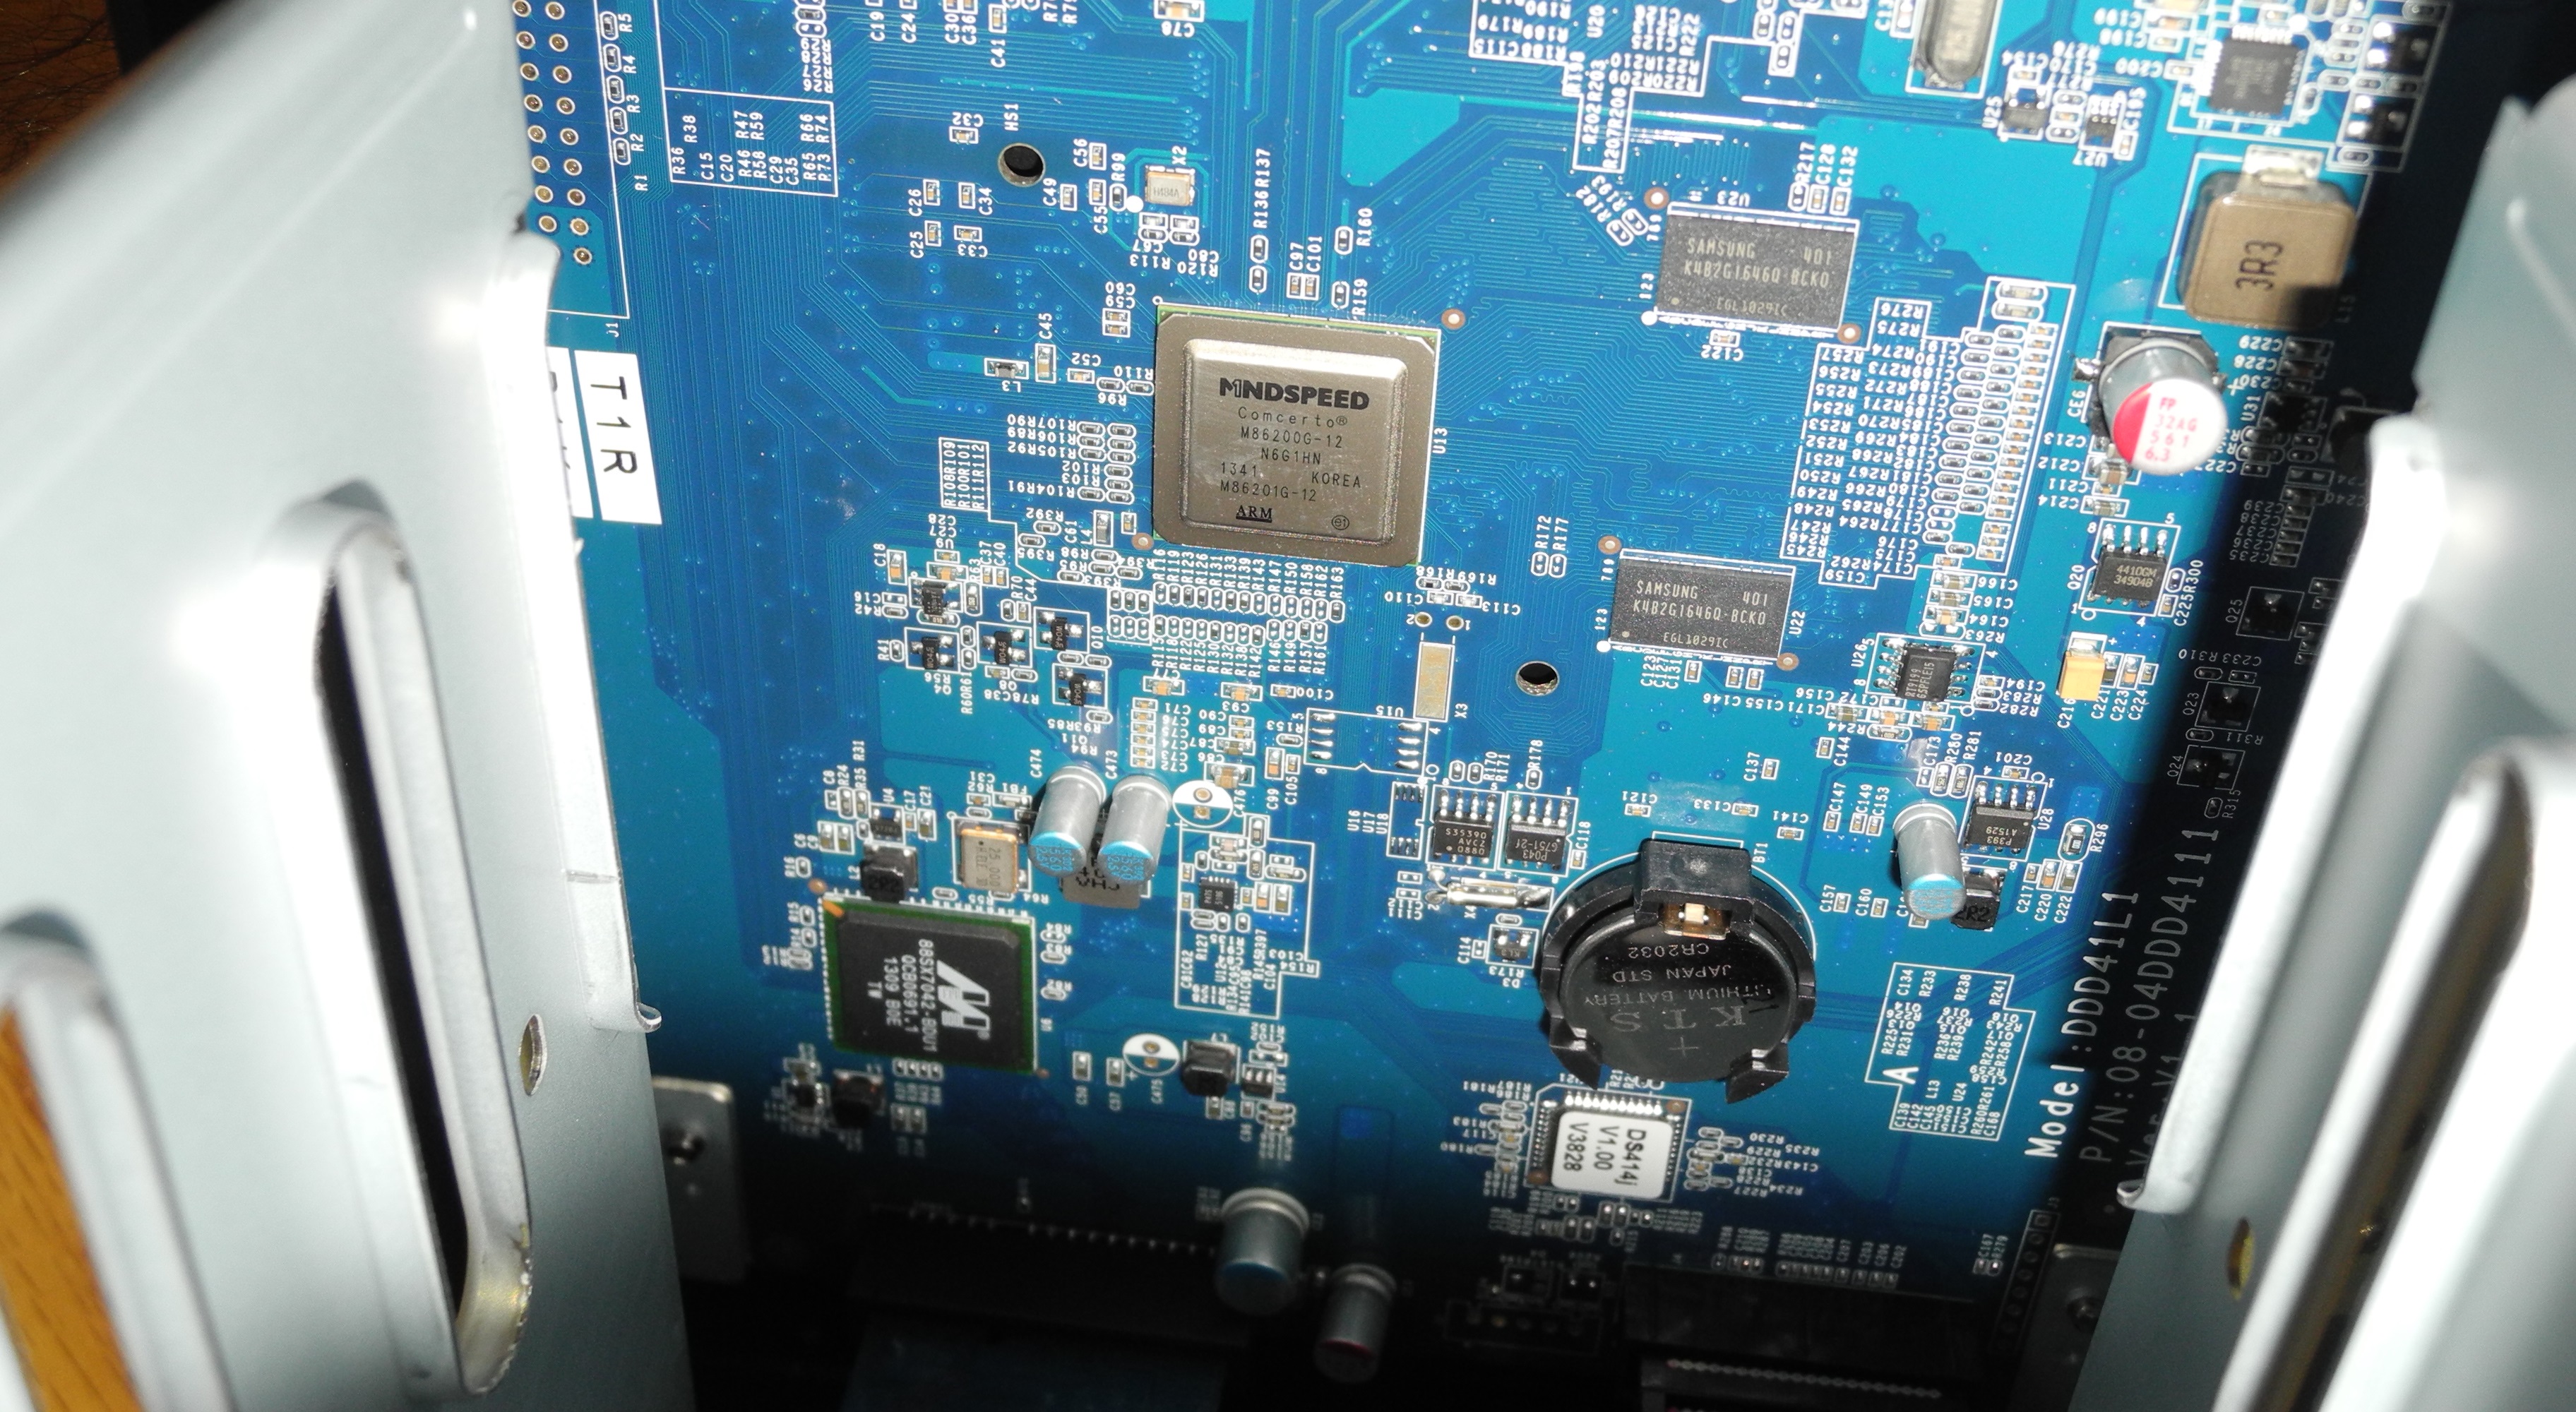
We already looked at the block diagram of the SoC in our launch piece on the 414j. The available high-speed I/Os include 2x SATA2, 2x PCIe 2, 1x USB 3.0 and 1x USB 2.0. Three GMACs are present, but the 414j uses only one of them for its sole RJ-45 port (with the help of a Realtek RTL8211E GbE PHY connecting through the RGMII interface). The Marvell 88SX7042 is present in almost all 4-bay NAS units of this generation and the DS414j is no exception. It is a 4x SATA II to 1x PCIe bridge that connects the drives in all the four bays to the SoC. The rest of the ports on the unit (1x USB 2.0 and 1x USB 3.0) come directly off the SoC.
Setup and Usage
After connection to the network, the unit obtains a DHCP address (even in diskless mode) and could be setup using the web UI at http://<DS414j-IP>. The determination of the IP itself could be done through Synology's helper site, find.synology.com. This service occasionally finds existing Synology units in the network too.


The setup process is straightforward. At least one of the bays needs to be populated. We chose to use the web interface (rather than the Synology Assistant tool) to initialize the NAS. The firmware (Synology Disk Station Manager - DSM) can be uploaded from a local file in this process. Basic administration settings are also configured. After a restart, the rest of the configuration is handled through the DSM web UI.
Upon logging into a freshly installed DSM, the user is provided with various options to aid in setup of external access to the NAS. Synology allows its users to create a MyDS account on their servers. The NAS units themselves are provided with a unique 'QuickConnect' ID. A MyDS account can have multiple QuickConnect IDs associated with it. The combination of this ID and a MyDS account helps Synology operate a relay service for access to the NAS from an external network. Users can opt to not register for these, but still enjoy external access if they forward the appropriate ports on their router.


The combination of a desktop-style interface and a multi-tasking UI with support for desktop widgets makes DSM a pleasure to use. Backing up the eye-candy is a rock-solid Linux-based storage management system and a wealth of applications (both Synology-created and third-party developed). Exploring all the features of DSM 5.x deserves a separate piece by itself. However, we will take a slightly different approach. In the DS214play review, we focused on the external access and multimedia features. In this, we will talk about the cloud / NAS backup and synchronization capabilities after discussing the benchmark results.


Our testing sequence started with the insertion of a single disk and configuring it in Synology Hybrid RAID (SHR). For a single disk, it is effectively a JBOD configuration, but the addition of a second disk triggers a migration to RAID-1. Even though the unit officially doesn't hot-swap, we were able to add and replace disks with the unit powered on. While migrating to the new RAID level on the DS414j, the data remained online and the process got done without any hitch. We tested RAID-5 rebuild by yanking out a disk during operation and re-inserting it (after externally formatting the drive). The rebuild process was also uneventful. On the whole, we were very satisfied with the unit's handling of storage operations (including handling of disk failures)


41 Comments
View All Comments
Dunkurs1987 - Monday, February 15, 2016 - link
Yes its really just for file server,but there is not big price difference if want some multimedia with plus model or play:
http://www.span.com/compare/DS416J-vs-DS416-vs-DS4...