Build-A-Rig Round 2, SilverStone vs Crucial: The $800 PC Build Logs
by Daniel Williams on November 4, 2015 2:00 PM EST- Posted in
- Build-A-Rig
- Crucial
- SilverStone
After starting our second Build-A-Rig project a couple of weeks ago the build logs are in and we can see what it is like to work hands on with the hardware selected by SilverStone's Tony Ou and Crucial's Jeremy Mortensen. Build-A-Rig allows us at AnandTech, with the help of Newegg, to create builds with the parts picked by industry members. Aside from a budget and target use case there are no other restrictions on what each company can do with their build.
With parts list in hand we interviewed both Tony and Jeremy, discussed their background and motives for choosing the components they did, and ran a detailed critique of all the components chosen. For our second Build-A-Rig match they were given the objective to build an $800 back to school build. SilverStone shot for a machine that slanted more toward gaming and high quality components while Crucial maintained a more balanced machine with a more potent processor and larger SSD.
Before we go any further let's dig into the build logs and see what it was like to work with the parts chosen.
Building SilverStone's Mighty Milo
| SilverStone's Mighty Milo | |||
| Component | Selection | Price as Chosen |
90-Day Average |
| Processor (CPU) | Intel Pentium G3258 (2C/2T, 3.2 GHz) |
$69.99 | $69.99 |
| Motherboard | ASRock H97M-ITX/ac | $95.99 | $93.20 |
| Graphics Cards (GPU) | Zotac GeForce GTX 960 OC | $179.99 | $179.99 |
| Memory (DRAM) | Crucial Ballistix Sport XT (2x4GB) DDR3-1600 C9 |
$39.99 | $43.95 |
| Storage (SSD) | Crucial BX100 120GB | $69.99 | $67.75 |
| Storage (HDD) | 1TB Western Digital Blue 2.5-in 5400 RPM 8MB Cache |
$60.99 | $60.99 |
| Power Supply (PSU) | SilverStone ST45SF 450W Bronze SFF |
$69.99 | $71.33 |
| Chassis | SilverStone Milo ML08B-H (with handle) |
$84.99 | $84.99 |
| CPU Cooling | SilverStone Argon AR06 | $39.99 | $39.99 |
| Operating System | Microsoft Windows 10 Home 64-bit OEM |
$99.99 | $99.99 |
| Extras | None | ||
| Total | $811.90 | $812.17 | |
SilverStone manufactures a wide variety of different PC parts, and they definitely leveraged that here in their Mighty Milo build.

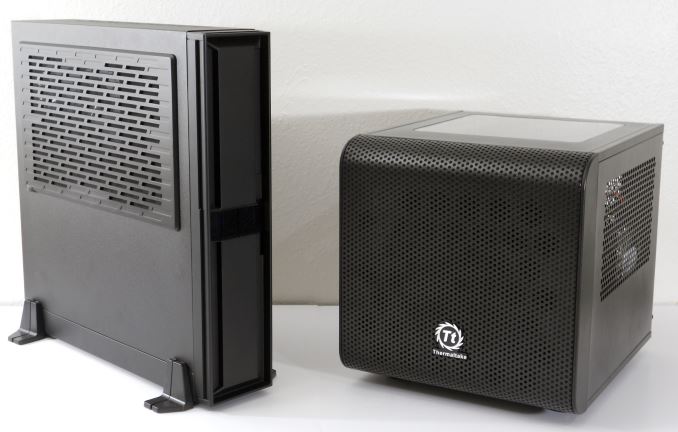
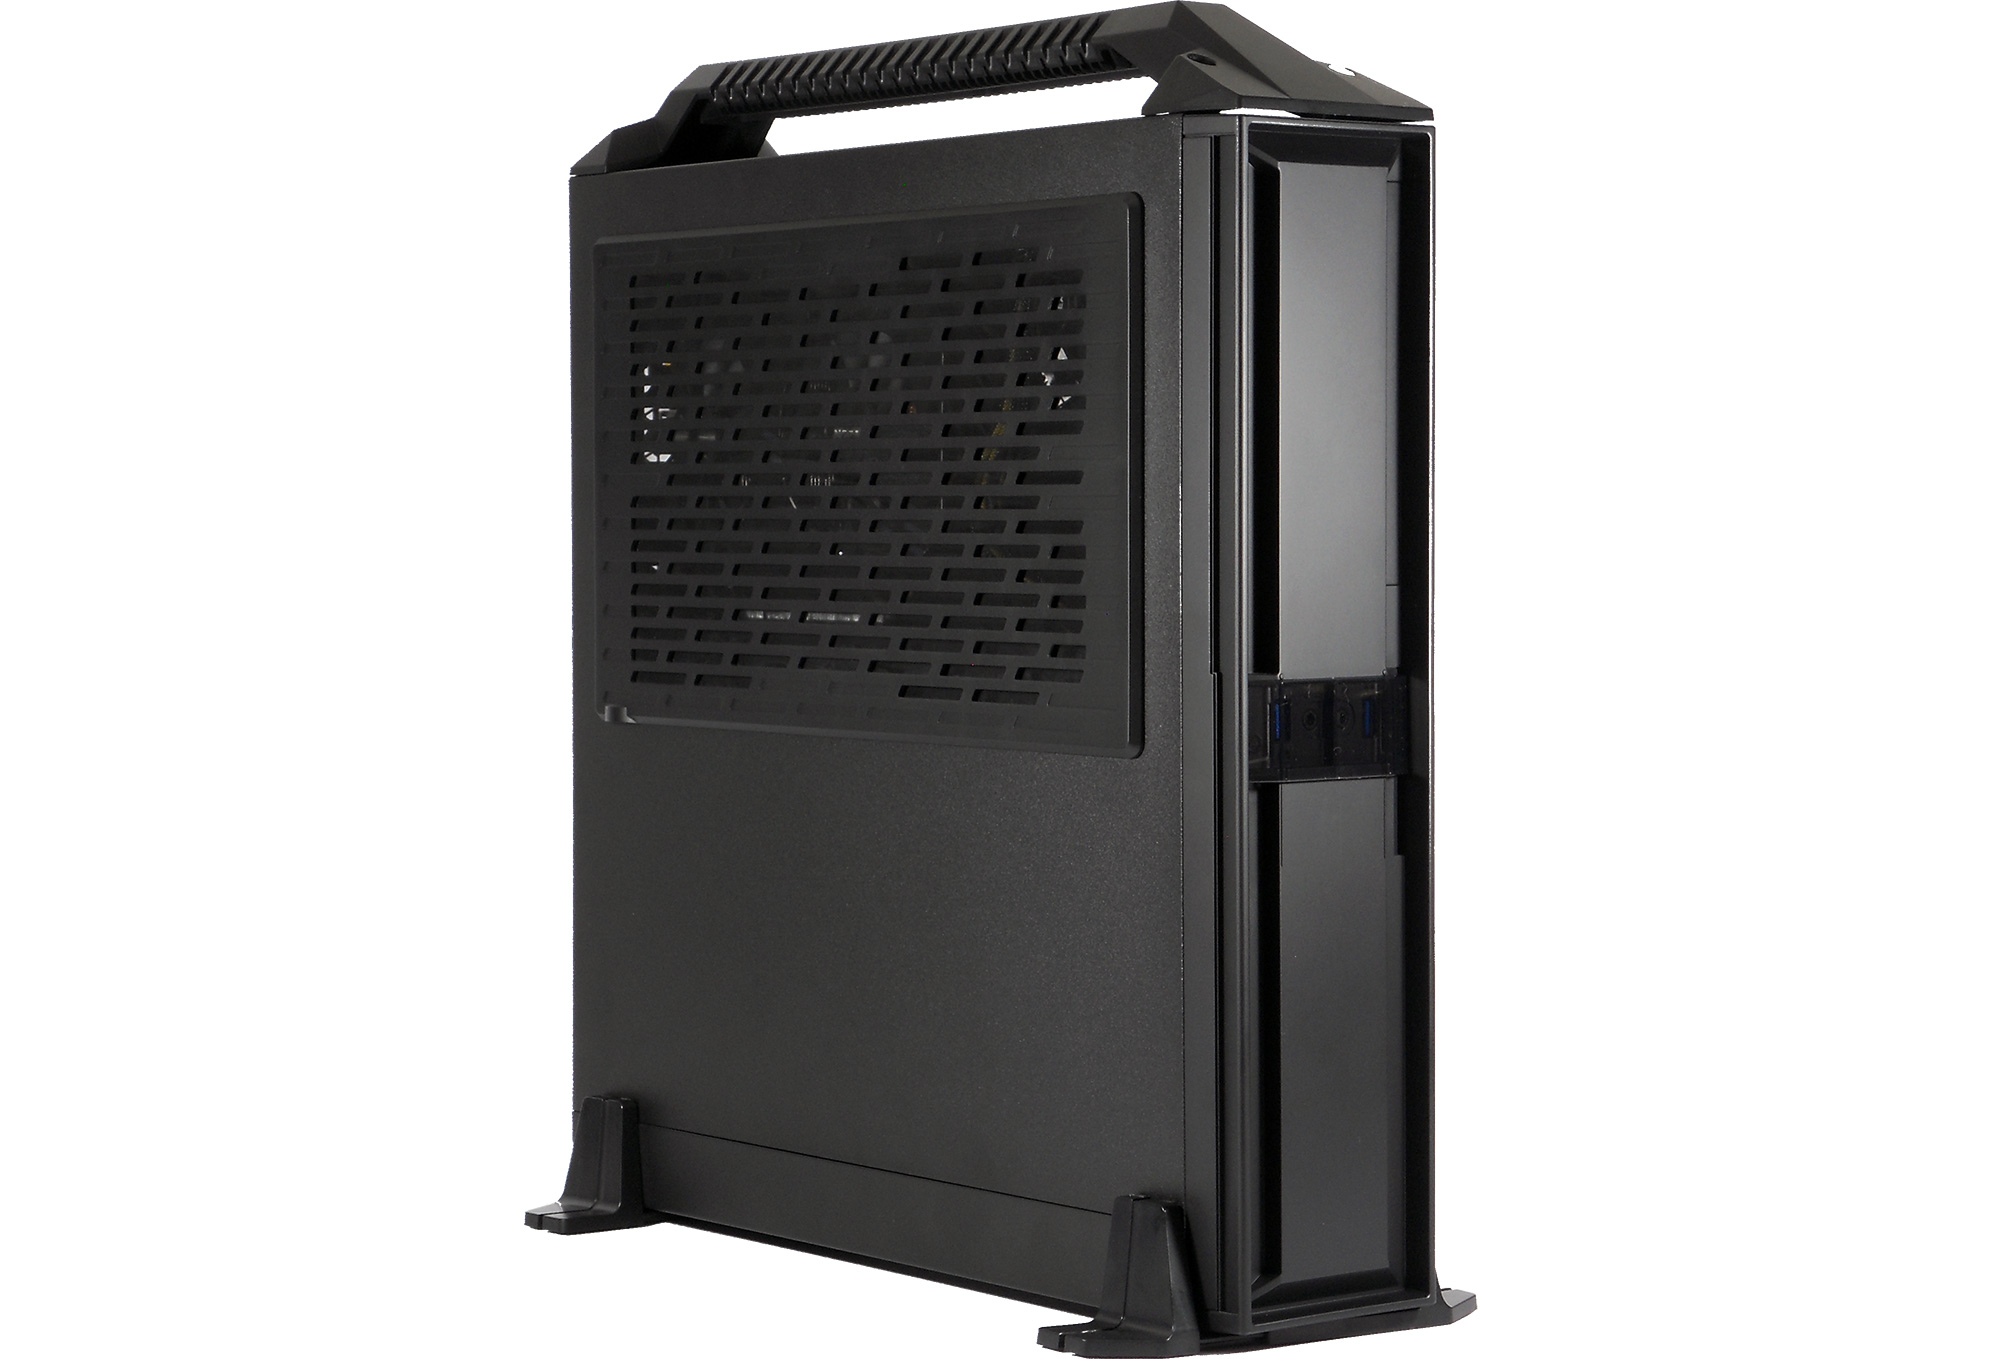
The SilverStone ML08 is a slim mini-ITX case designed to be convenient and portable. It sports two separate compartments that isolate the GPU from the rest of the computer to limit any thermal interference by the hottest components in the system. The case also has wide openings as it lacks any fans actively pulling air in. This opens up the possibility for this machine to be quieter at idle or low load with fewer fans running inside.
Unfortunately this case has very little tool-less functionality. I have to admit that maybe I've become spoiled in recent years but if feels different now using a screwdriver for everything. Though I can say that the look is improved by not having thumbscrews protruding from the back of the case.
Going into this build I planned on following the included instructions since this was my first time with a Silverstone case and everyone I’ve talked to has told me that SilverStone cases are easy to build in if the instructions are followed. In the end the instructions were helpful to tell me what order to do things but didn't go much more detailed than blow up diagrams of the assembly process. On the other hand without instructions I would have missed installing brackets on the PSU and GPU, which may not be necessary but will help hold the parts in place as it is shipped to the lucky winner.
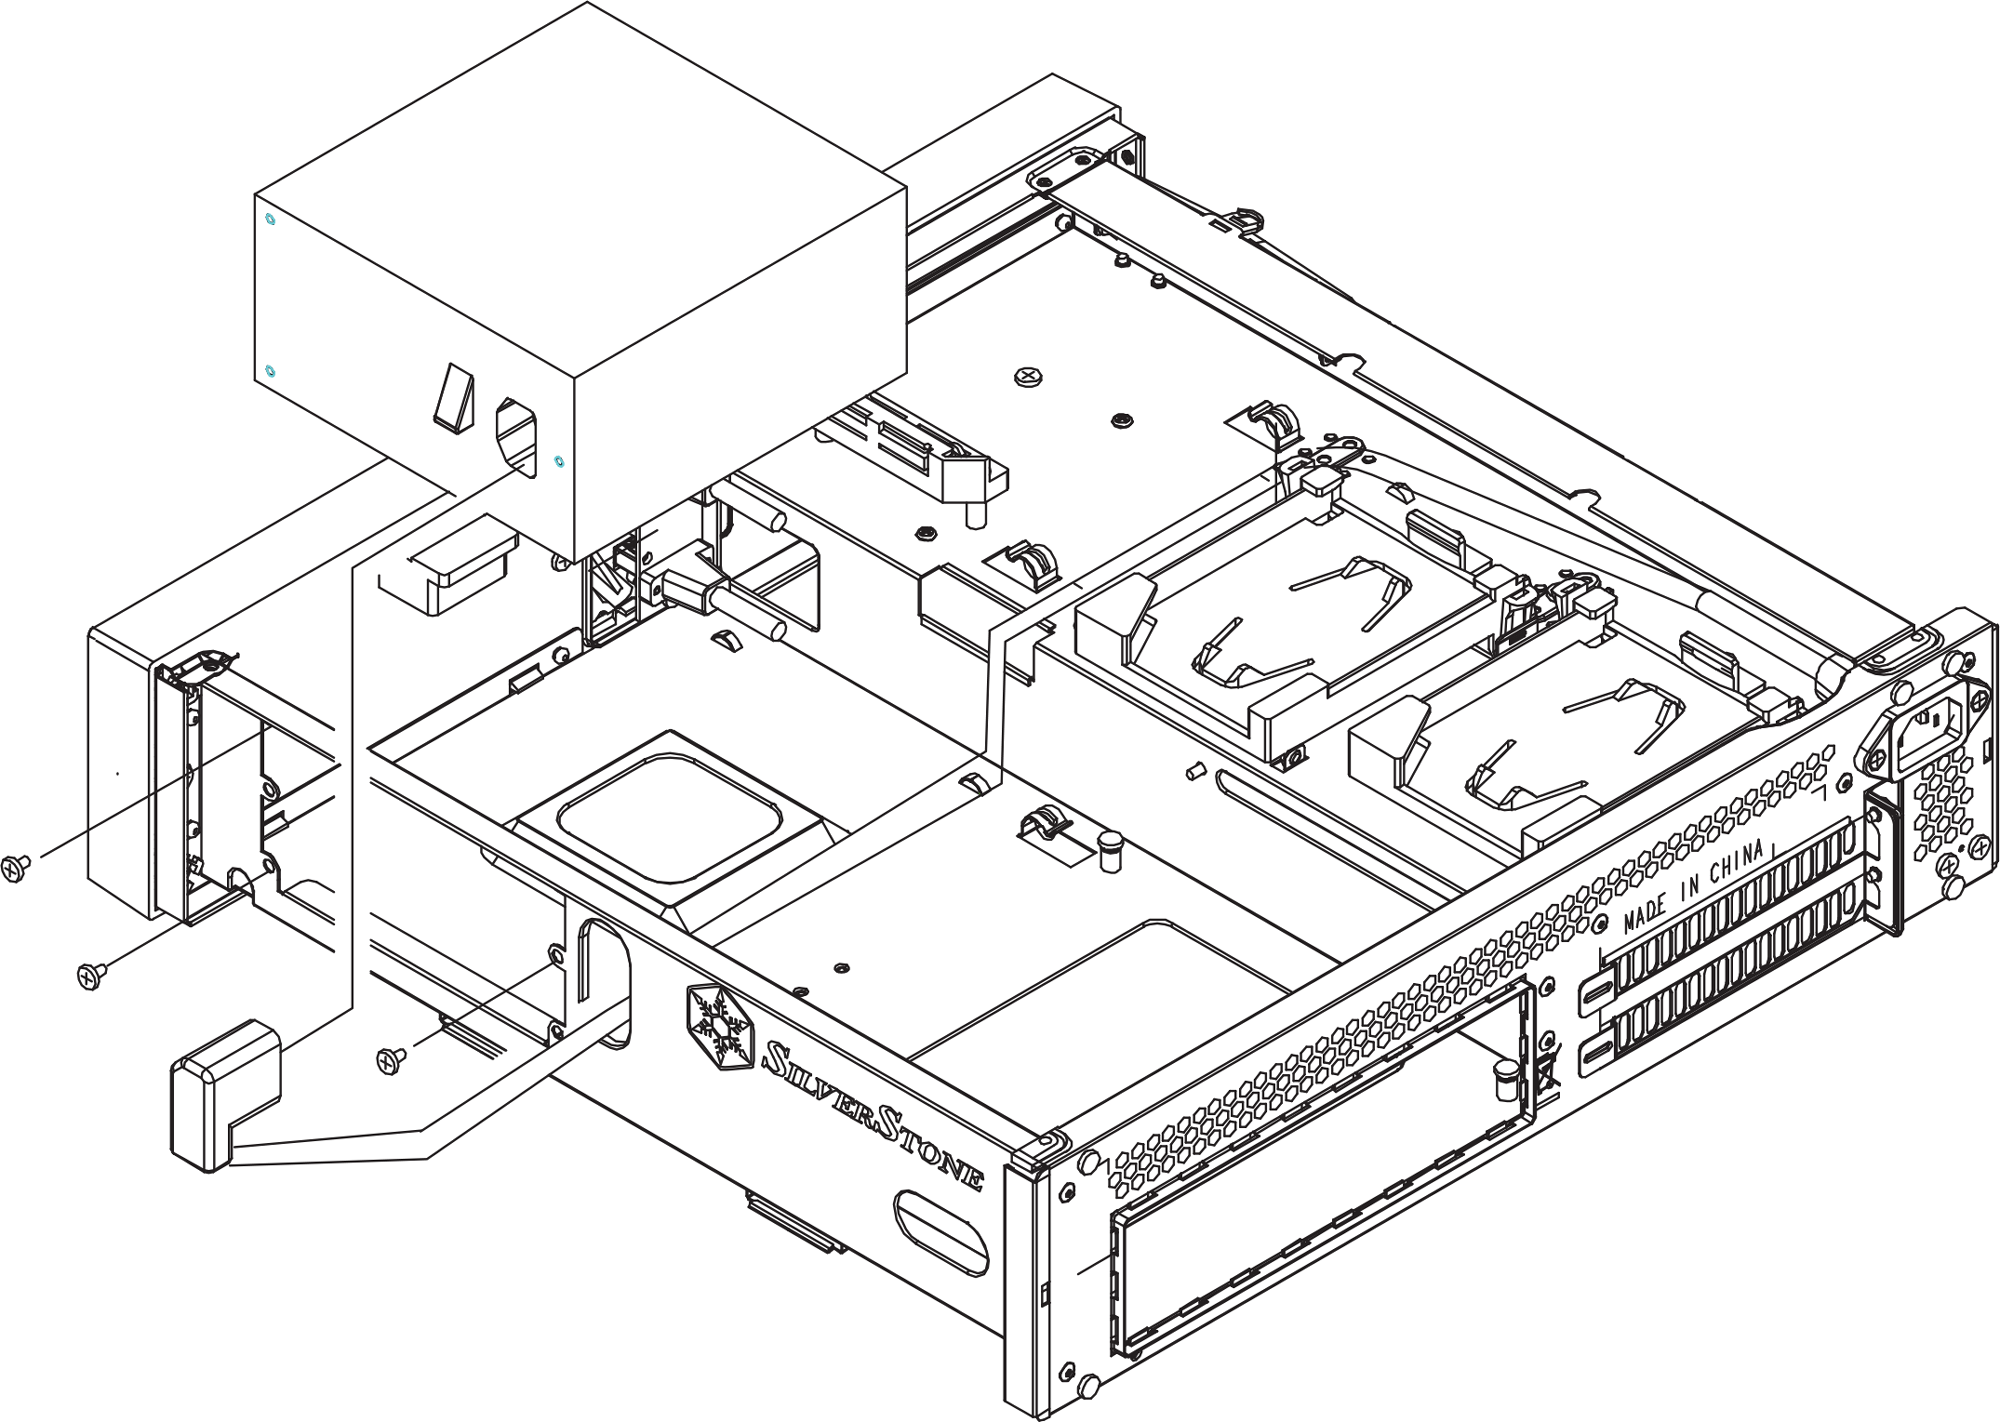
The SilverStone SFX 450w PSU was a bit heavier than I expected as I removed it from the packaging. Another minor surprise was that the case is meant to install a PSU with just three screws instead of one at each corner; two screws on each of the left corners, a single screw on the middle of the right side, which the SilverStone PSU helpfully has a hole for. I of course noticed this in the instructions after seeing the screw holes at the corners not quite lining up together. At this point I could see that cable management will be a bit tight as this PSU has cables long enough for a larger standard case, with the CPU power being the only cable needing to reach more than a few inches when wrapping around the motherboard.
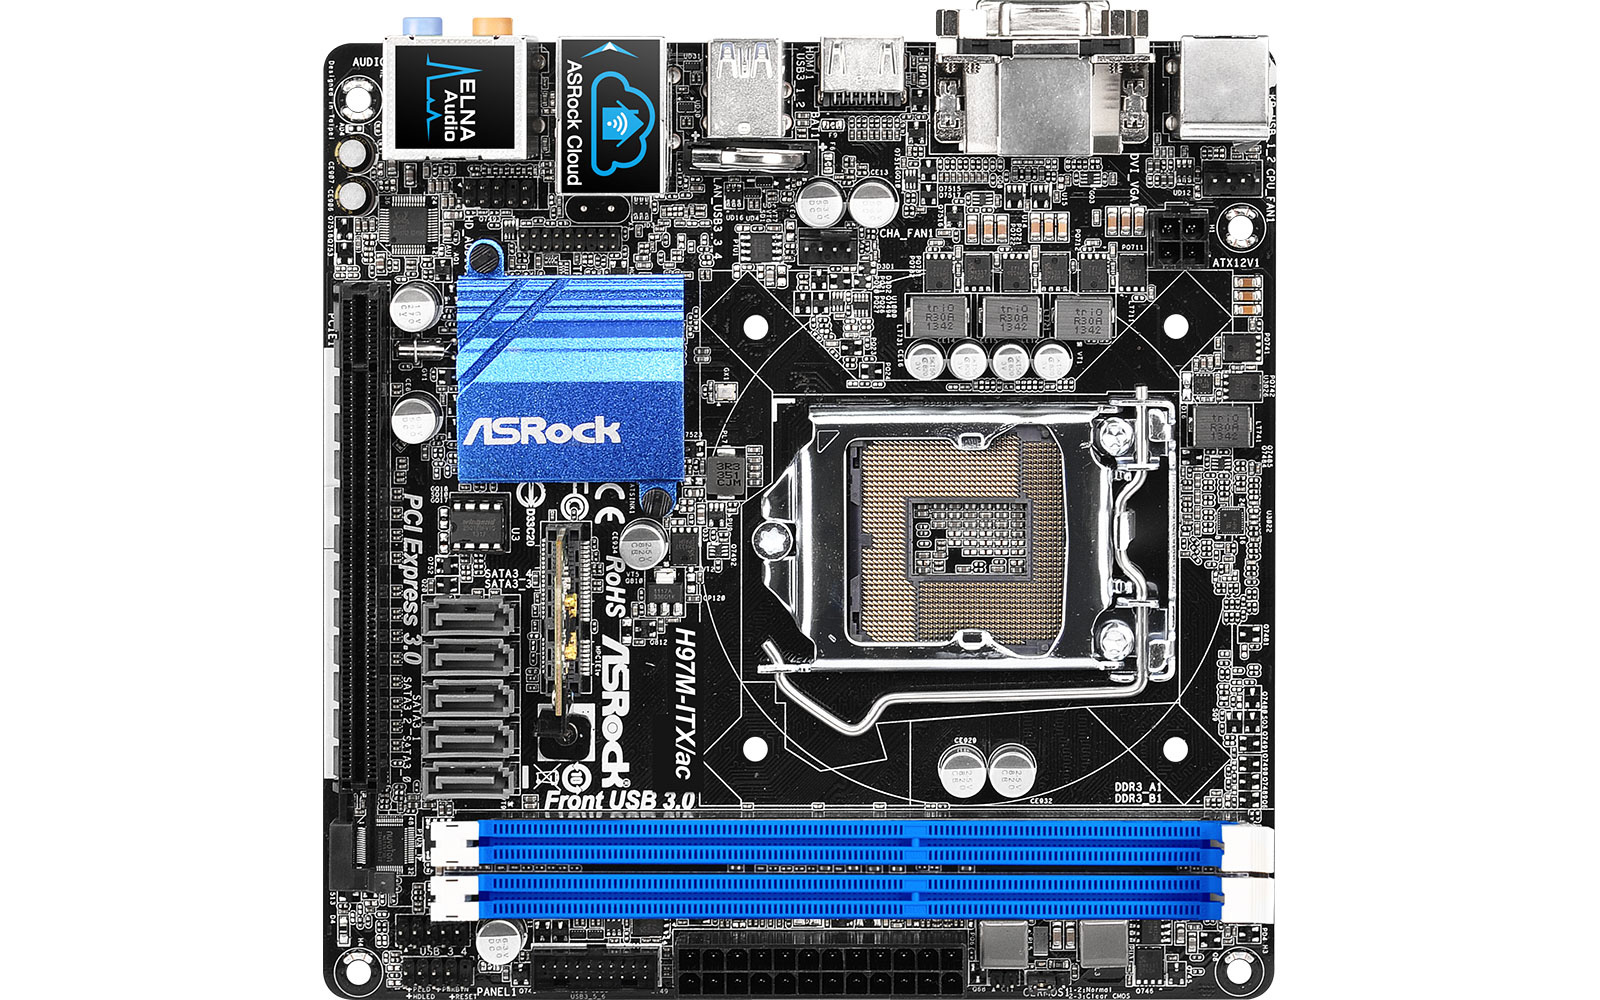
I assembled the motherboard outside of the case to verify everything was in working order before installing it. The Pentium G3258 and Crucial Ballistix Sport XT ram were installed with no issue. The SilverStone Argon AR06 cooler was a little different but not too troublesome. After getting the mounting brackets installed on the heatsink I put thermal grease on the CPU, not realizing it wasn't thermal paste which I am accustomed to, which caused me to put on more of a pea sized portion than the grain of rice sized amount I was aiming for. To mount the cooler I decided to place the cooler on the table fan down and set the motherboard on the cooler to install it. From there fastening the motherboard in a crisscross pattern went as expected, though as there were no back plate, tension screws, or other spacers on this cooler I had to proceed slowly since I didn't want to cause unnecessary flex in the motherboard. Later on temperatures were fine so I likely got a good mount on the first try, but those who have never installed an aftermarket cooler might need to try a few times to get a good mount.
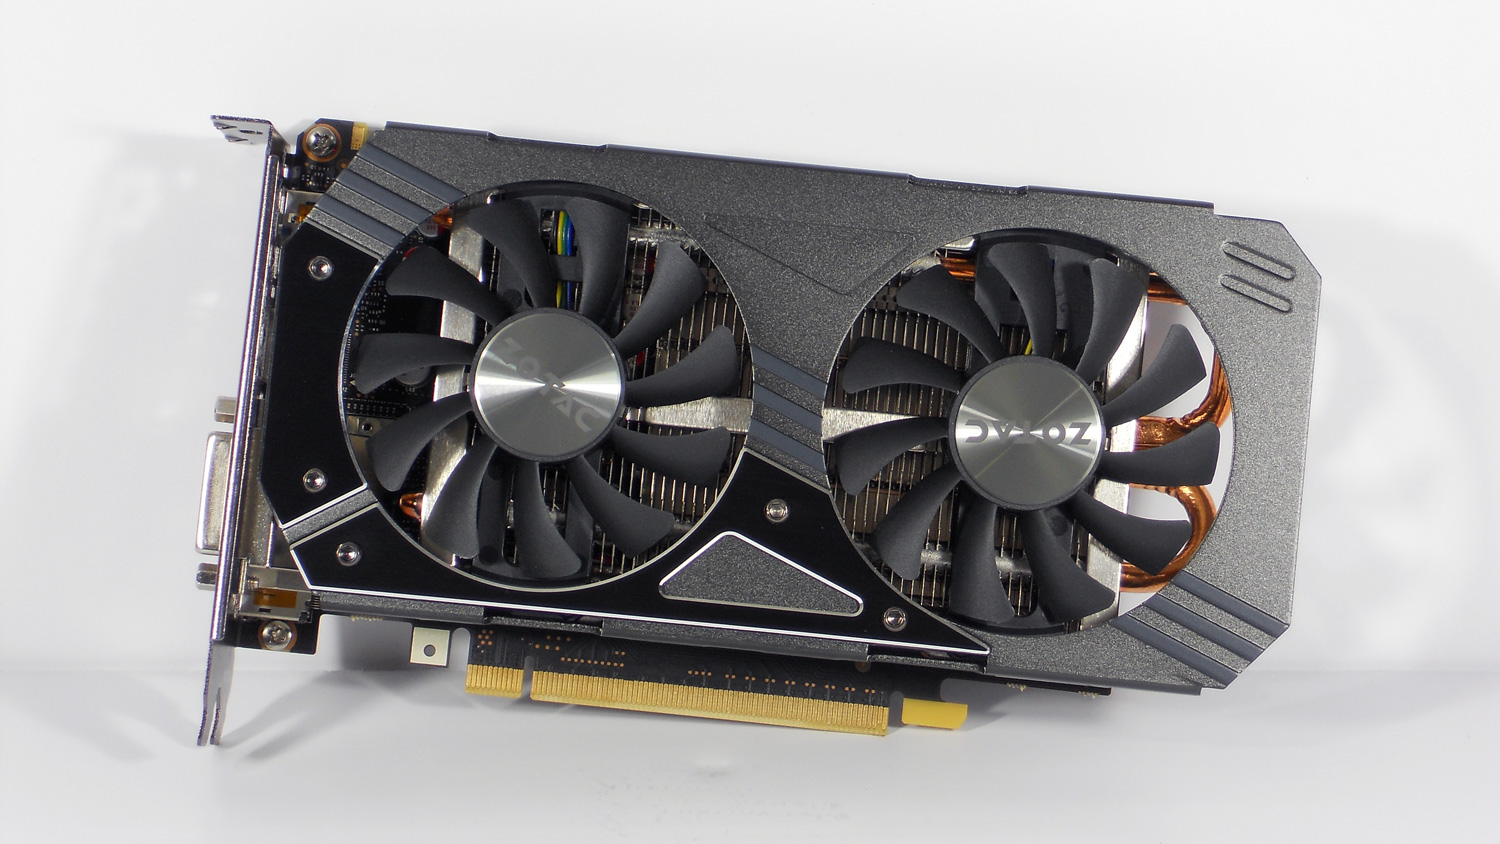
With the motherboard assembled I installed it right next to the PSU. After the motherboard is in there is a PCI-e riser and extension that are used to route the PCI-e slot to the other compartment of the case for the GPU. After screwing the riser into place the Zotac GeForce NVIDIA GTX 960 was installed and the GPU bracket put in place to help keep the card stable in shipping. I felt the instructions for the bracket were a bit unclear and had to test fit a few screws to find one that would hold the bracket to the case properly. It all worked out and the GTX 960 should hopefully not be going anywhere.
The last steps were to install the Wi-Fi adapter and the storage drives. Here I realized that the Wi-Fi adapter would have been easier to install with the motherboard outside of the case due to the metal bracket that helps to hold the card straight. Luckily I have a good eye for squaring things out and had no trouble screwing the bracket to the card outside of the case and having the other hole line up perfectly after sliding the adapter in. Bonus points go to ASRock here as well, for including a drop of threadlocker on each screw for the Wi-Fi adapter. I'm not sure if it would be needed but extra security is always a good thing. I found running the antennas a little fiddly, those antenna connectors are tiny. After the antennas were connected to the card the other ends were put through the IO shield. I did need to grab a wrench and socket driver here to tighten the antenna connectors into place. For those unaware as I was it is a 5/16" (8mm) socket that I needed to tighten it down.
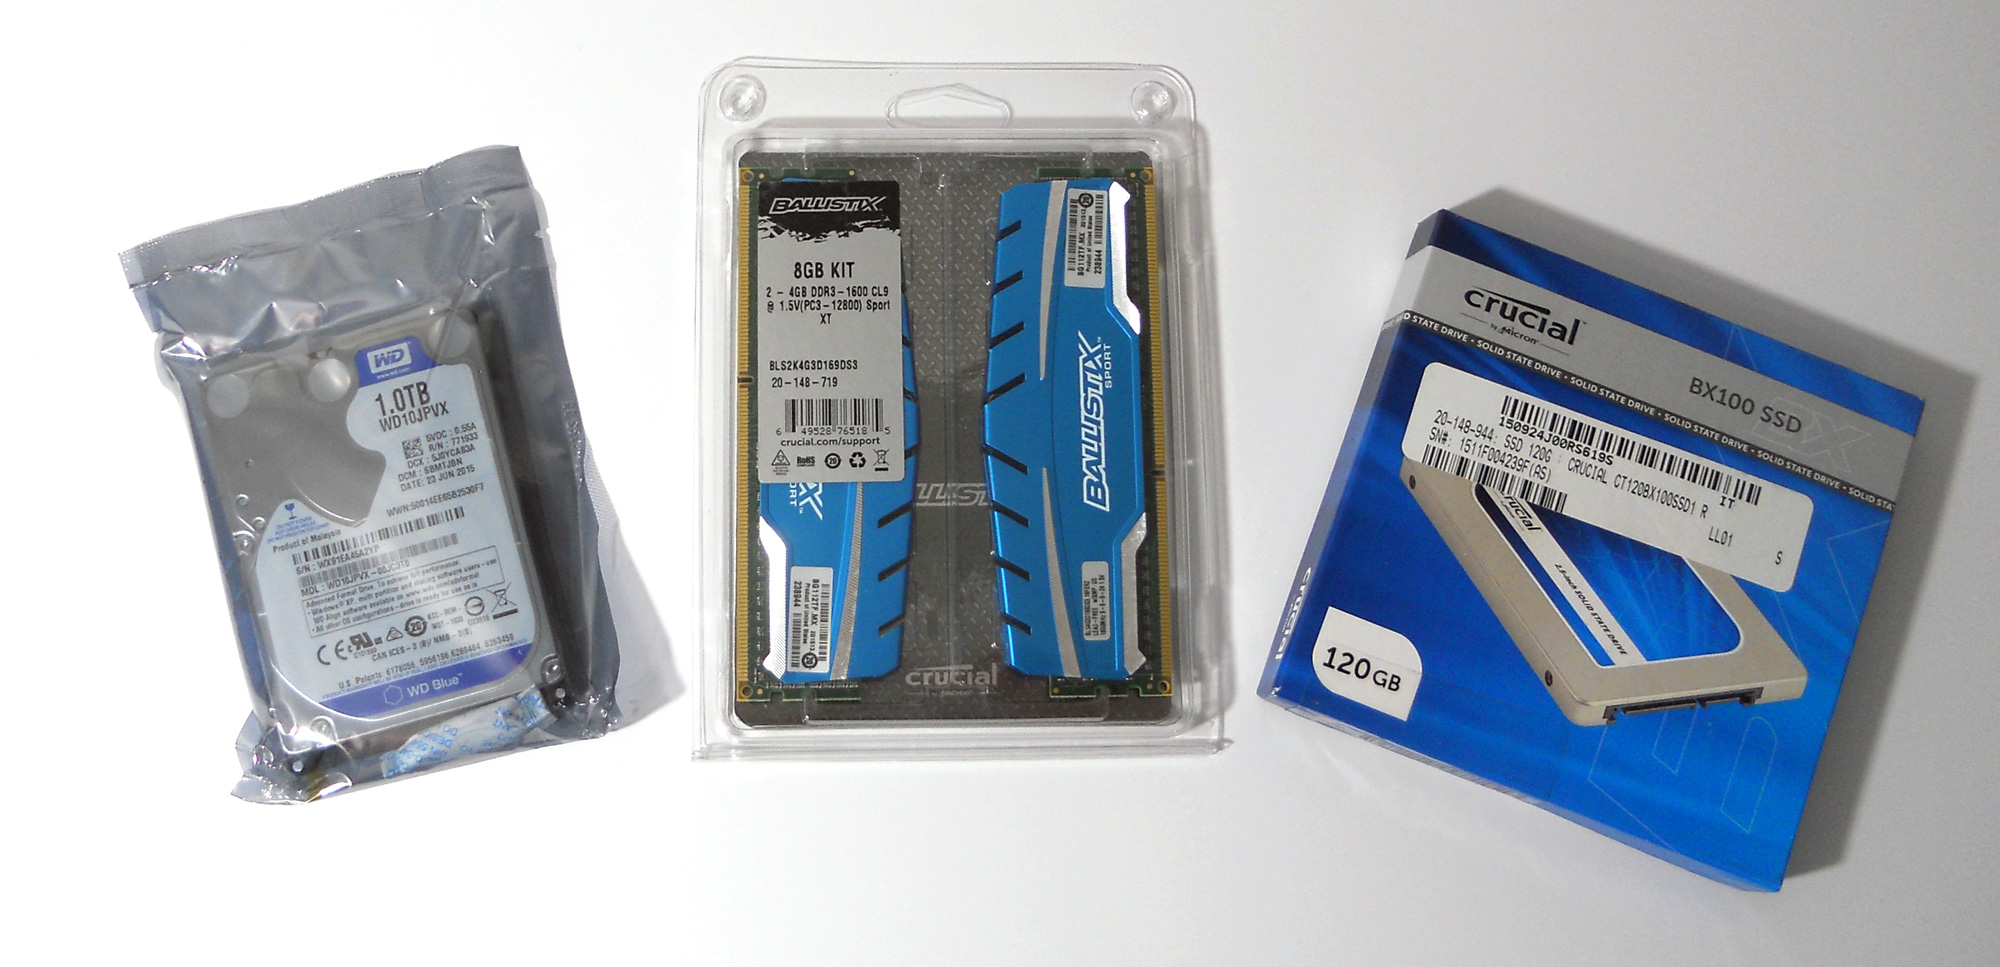
When installing storage I noticed a minor disappointment. While looking at all of these parts it became obvious to me that Tony made an effort to match a color theme in this build with a blue CPU fan, blue ram, and two blue storage drives. Unfortunately unless I'm missing something the drive sleds want the drives to be installed label down, as Installing the drives label up with the connectors closer to the motherboard will leave part of the ports covered. That being said I eventually got the 120GB Crucial BX100 and 1TB Western digital blue 2.5" drives installed, and when everything is oriented properly installing the drives is a very easy process.

Now that all of the hardware was in place I just had to run cables. I had a few things working against me here, most of them being cables that were much longer than needed. The CPU power cable was pretty much perfect, but the 24 pin hardly even needed to go six inches, and the SATA cables that came with the motherboard were 18 inches long. For context this case is about 14 inches deep.
For the SATA cables I doubled them up and cable tied them to keep them contained. For the PSU cables and front panel connectors my options were to either stuff them next to the PSU and motherboard or snake them through a couple of holes into the other compartment next to the GPU in an effort to use more of their length and hide them out of the way. That latter option would have been much neater but also would have limited future options of either upgrading to a bigger GPU or placing another HDD behind there. So I decided to take function over form and leave those options open for the future. I did have to use a cable tie in the bundle of wires to hold them down. At first I threw one of my own cable ties in, before realizing there were some six inch ties included in this build that would have worked fine.
Now the Mighty Milo is all together and ready to rock. The build process felt a bit tedious but at the end we have a reasonably compact and portable system that could fit into many different environments. It also should be noted if the less tinker friendly nature of this case wasn't obvious that taking the case panels off requires the removal of the handle. With that finished lets go see how Crucial's Ballistix Bantam is getting along.


32 Comments
View All Comments
isaac12345 - Friday, November 6, 2015 - link
Sure....lets have the user buy an already outdated piece of technology with their hard earned money which would hardly last a year or two for gaming purposes and maybe a year for other more CPU intensive tasks, just so that they could compensate for bad software and software management with an expensive component. Lets ask the user instead to overclock that could result in decreased longevity for all of its parts. That's definitely the more convenient and less risky way to go about this. Sure...isaac12345 - Friday, November 6, 2015 - link
And lets not forget that the user will not get the full 120GB after formatting the SSD. And after installing Windows and essential software like antivirus, browser, codec pack,etc you will probably be left with 80-90GB. That's just enough space for 2 modern games. But obviously the incovenience of managing your data constantly is far less than brief random pauses of a spinning HDD. Sure...isaac12345 - Friday, November 6, 2015 - link
Try running this on any of these systems - http://www.eurogamer.net/articles/2015-11-06-assas...DanNeely - Friday, November 6, 2015 - link
I have to use an HDD only crippled computer at work every day. I'd kill for even a 64GB SSD; which'd let me hold the OS a few key applications and the sourcecode for whatever I'm working on at the moment. Having to manually manage that a few times a year as I switch projects would be much less frustrating than the random HDD freezes I get a few times a day.isaac12345 - Friday, November 6, 2015 - link
Your random HDD freezes could do with not the HDD itself but with the software on it. If you are on a windows machine, run crystaldiskinfo to confirm whether your hard disk is in good condition. If it is, you could check out the event viewer in windows to see if it logs the random freezes.DanNeely - Saturday, November 7, 2015 - link
My observations aren't about any single computer except to the extent that outside of work I all of mine are SSD based and have been for years. Every HDD computer I've ever used, whether for home, work, or school has done it. Up until I bought my first SSD 5(?) years ago, I'd accepted it as just the way computers were. Now it's something I swear at every time I have to use someone else's piece of junk.Haravikk - Saturday, November 7, 2015 - link
In my experience RAM is more important for speeding up games; I'd still want an SSD to boost load times, but if dealing with a budget I think an SSD is something can be left till later (plus you'll appreciate the difference more). The 1tb Seagate SSHD is currently very reasonably priced, so would eat some of the speed difference, which is why it's my preference for any budget build.It's also worth looking at a motherboard with an M.2 slot, so when you upgrade to an SSD you can get something much, much better. The 256gb Samsung 950 NVMe M.2 SSD is pricey compared to SATA offerings, but 2.2Gb/sec I think it'd be way more worth it, as a future upgrade than forcing in a relatively weak SSD now and end up lumbered with a dual-core only CPU.
DanNeely - Saturday, November 7, 2015 - link
Enough ram to only swap under exceptional circumstances is something I assume is a given in any halfway decent system along with a PSU that won't self destruct under load and destroy your system. (jonnyguru has fun destructively reviewing these every one in a while.)isaac12345 - Tuesday, November 10, 2015 - link
That's odd. That usually doesn't happen unless you are running the latest intel skylake systems. My point here is though that prioritising loading times and a random hiccup here and there while using the system is far more tolerant if what you get in return is a much stronger CPU and GPU which will improve system performance FAAR more and make it more futureproof.Haravikk - Saturday, November 7, 2015 - link
For small form factor I'm actually rather intrigued by the Sharkoon CA-I; it's taller and narrower than the Thermaltake case, with a top mounted exhaust fan (which is my preference for exhaust anyway). It only takes half-length cards (20.7cm or less), but it's very reasonably priced, well made and compact, the only thing it lacks is a carrying handle which would be nice (might be possible to add one myself).I managed to get two systems for it under the $800 mark, though the component prices are varying wildly and you need to get the case from elsewhere (I've seen it as low as $40 though), so keeping it under budget may require some tweaks:
Here's the Intel i5 version (best future upgradeability, including an PCIe 3.0 4x M.2 slot):
http://secure.newegg.com/WishList/PublicWishDetail...
And here's the AMD alternative which shaves cost on motherboard and CPU for a much juicer GPU:
http://secure.newegg.com/WishList/PublicWishDetail...