GIGABYTE AM1M-S2H Review: What Can $35 Get You?
by Ian Cutress on August 15, 2014 3:00 PM EST- Posted in
- Motherboards
- AMD
- Gigabyte
- Kabini
- AM1
GIGABYTE AM1M-S2H BIOS
Unlike the mainstream platforms, one might forgive a manufacturer for not spending much time developing and optimizing a new BIOS topology for a low cost platform like AM1. Since GIGABYTE came into the graphical BIOS arena, its ‘classic mode’ has been a permanent fixture, especially for enthusiasts that find some of the newer implementations a little difficult to manipulate at speed. It is this classic mode that the AM1 platform falls back on, although the lack of CPU overclocking does strip out a number of options.
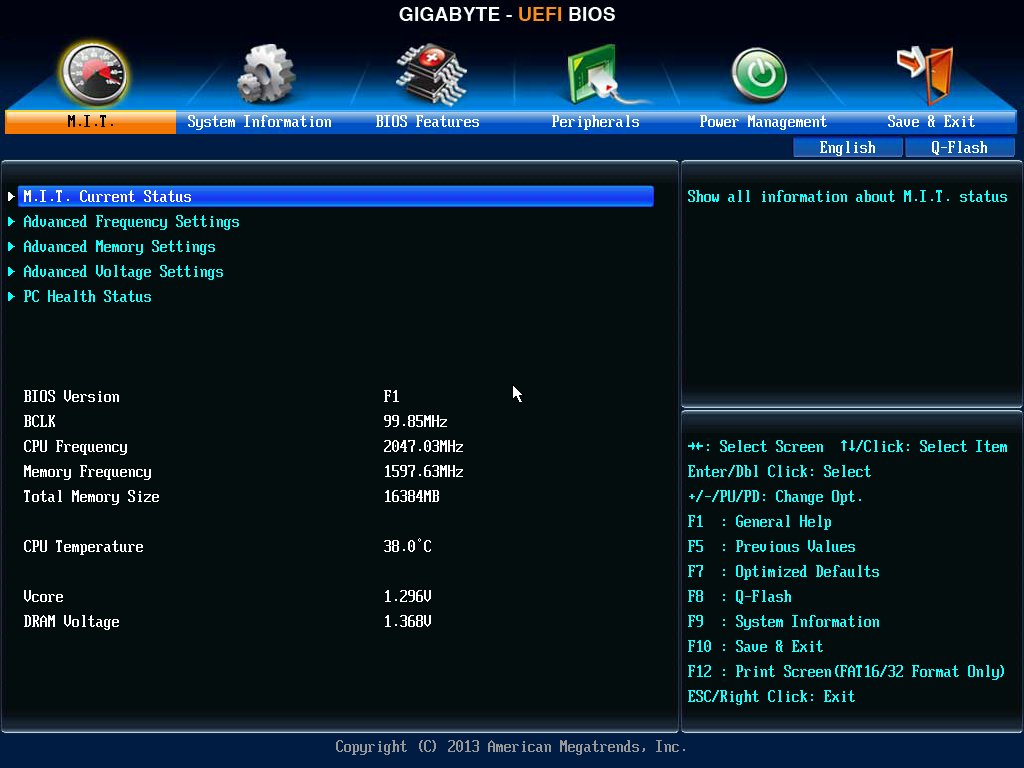
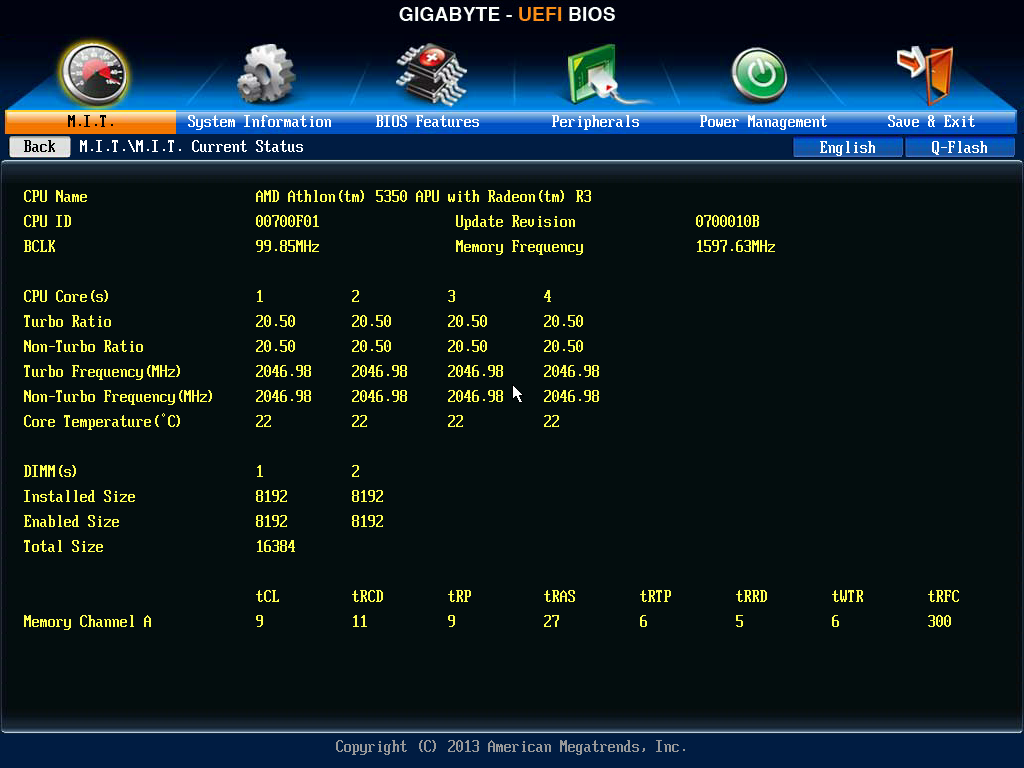
The first screen shows the BIOS version, CPU frequency, CPU temperature, DRAM size, DRAM speed and voltages, although the most poignant information is not here: what motherboard am I looking at and what CPU is installed. This is a perennial problem for the classic mode, which is rather surprising given that the Current Status option here displays at least the CPU used:
While the motherboard has the standard overclocking menus, there is little to actually overclock. In the Advanced Frequency Settings, we were unable to adjust the North Bridge frequency or the CPU Clock Ratio above stock settings:

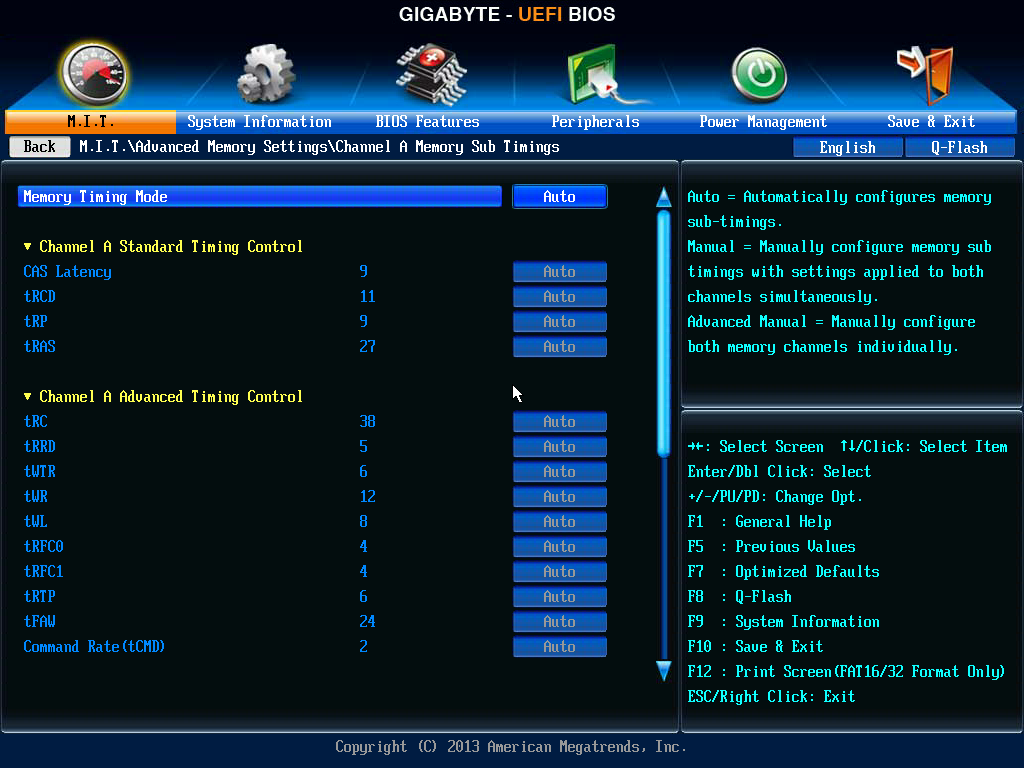
XMP modes are supported up to DDR3-1600 MHz, although the sub-timing options later in the BIOS can help with some extremely tighter timing kits (such as DDR3-1600 C7).
So while there are no direct overclocking options, users can adjust the CPU, NB and DRAM voltages should they want to make the system as low-power as possible:

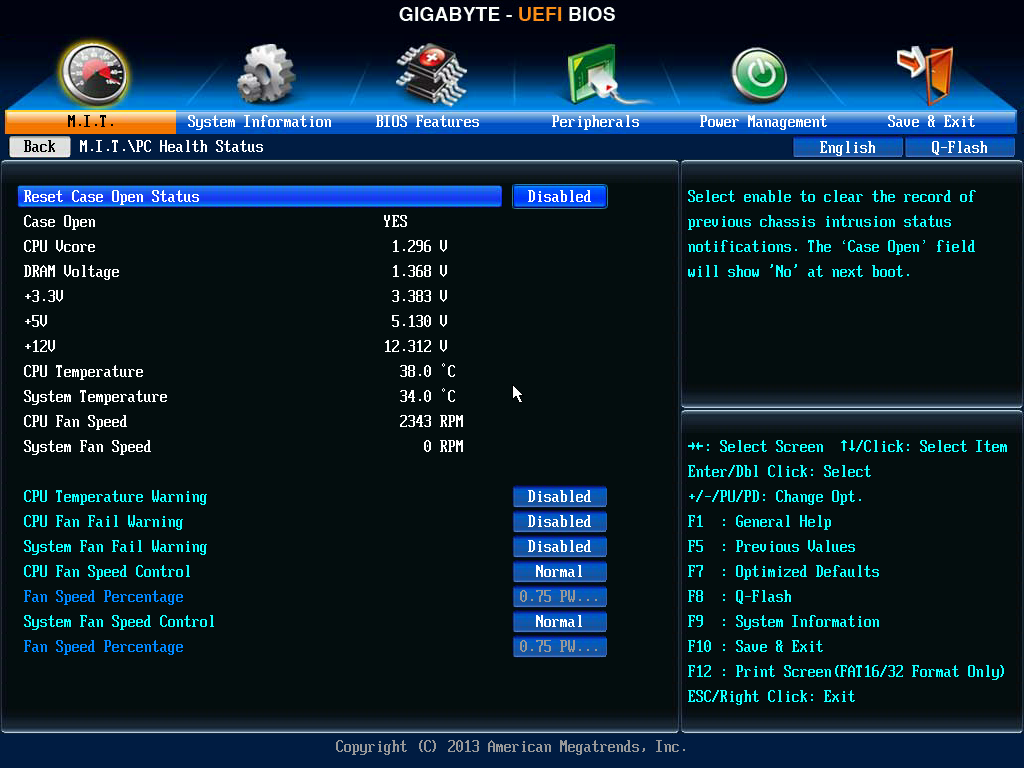
The PC Health Status menu is where the fan options are, although because this is GIGABYTE’s classic mode, these options are limited to a strange scale of ‘PWM / ºC’. What this means is how the fan power is adjusted according to the temperature, and as such a setting of 2.50 PWM/ºC will cause higher fan speeds as the system warms up than a setting of 1.25 PWM/ºC. This scale is not linear in performance, as the rotational speed of the fan is not directly proportional to the power across the whole range.
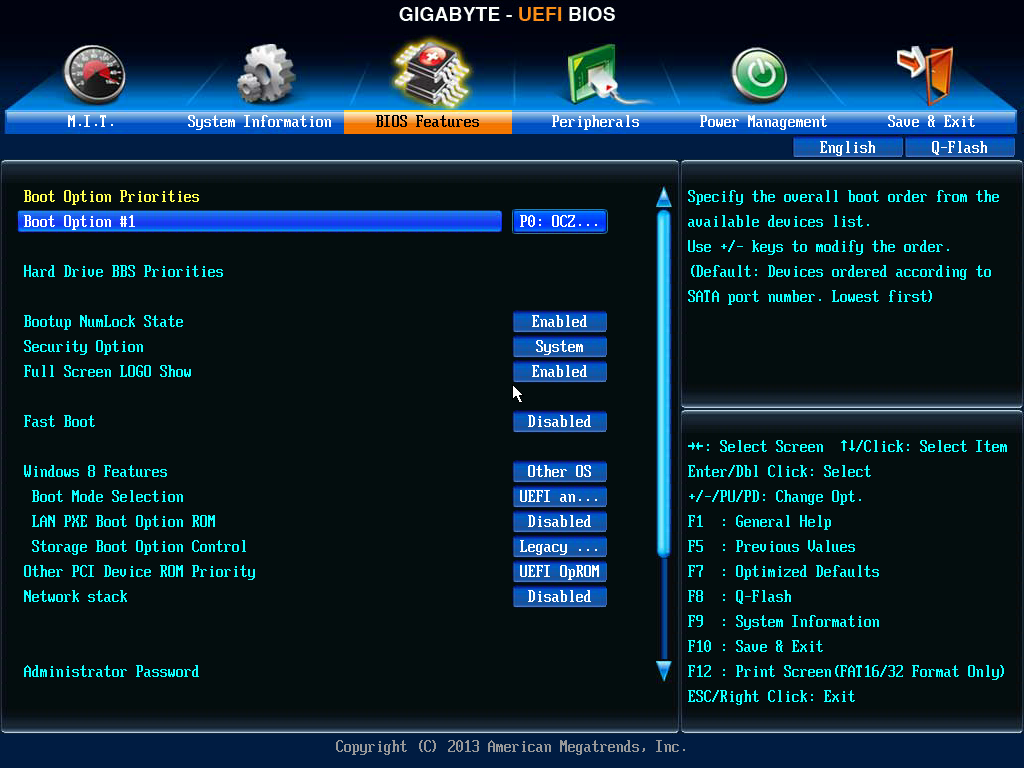
The BIOS Features tab gives options for Fast Booting into Windows 8 as well as adjusting the boot order.
The Peripherals section has fewer options than we are accustomed to due to the lack of extra controllers on the motherboard, however the audio/NIC/USB ports can be adjusted here, as well as the SATA configuration (IDE/AHCI) and the GFX options.

The final Save and Exit tab gives options for Boot Override or BIOS profiles:


GIGABYTE AM1M-S2H Software
In perhaps the same way that the AM1 BIOS is not up-to-date with the latest implementation, neither is the software. On GIGABYTE’s mainstream Intel platform at least, the options are all tied into a new interface and each iteration gives more features and functionality. With AM1, we are back with EasyTune 6 with its limited capabilities.
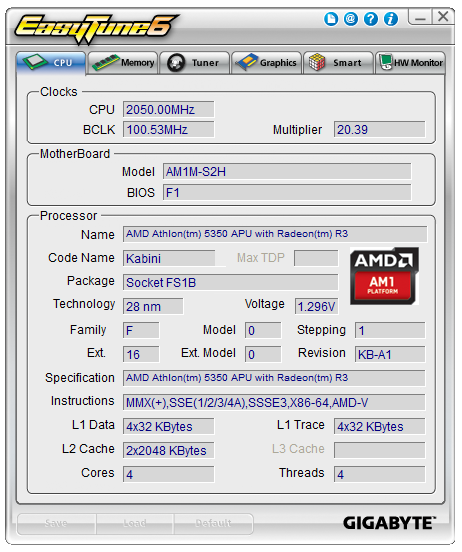
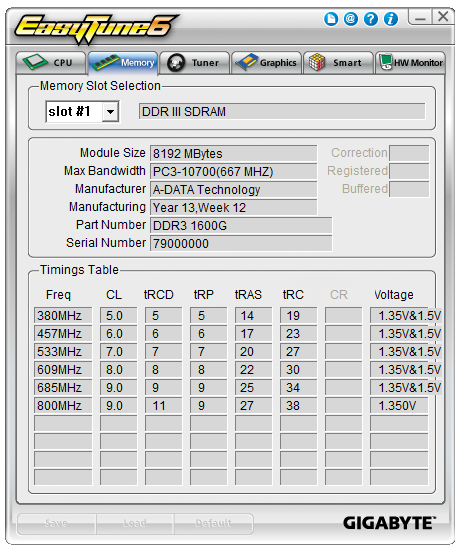
Because there is no overclocking on this motherboard, ET6 plays more of an informative role for the most part, letting us know which motherboard, CPU, DRAM and GPU are in play.
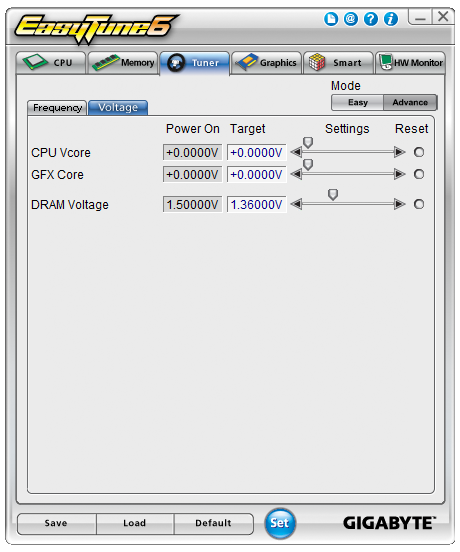
The Tuner section offers a little bit of modification, especially if the user wants to overclock DDR3-1333 memory to DDR3-1600:

The voltage options from the BIOS are also present for any user wishing to underclock and save power.
The basic EasyTune fan controls are here, offering a two point gradient for both fan headers.

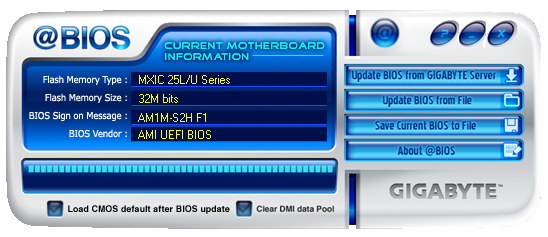
Because there was no way to update the BIOS through EasyTune when it was made, GIGABYTE developed @BIOS to perform the operation:


45 Comments
View All Comments
Flunk - Friday, August 15, 2014 - link
I'm confused as to why this needs an ATX 4-pin connector at all, they were introduced to provide more power to power-hungry CPUs. This doesn't need much power on the CPU socket so it seems unnecessary.It would also have been nice to see the gaming results with the IGP, most of these boards are going to be utilized with the IGP.
Considering the price of this platform the performance seems really great, I think I would recommend something like this to people who just want a very basic desktop system.
TerdFerguson - Friday, August 15, 2014 - link
This looks great, although I insist that the possibility of a $35 functional motherboard is far less astonishing than the possibility of a $200+ motherboard. Yet again, I challenge any honest, authoritative source to break down the build cost of a "high end" motherboard.StrangerGuy - Friday, August 15, 2014 - link
Every industry tries to rip people off as much as they could get away with it...Why would mobos be any different? Most people don't need more than a $50 even for gaming purposes, let alone $100+.Lonyo - Saturday, August 16, 2014 - link
The cost of a product is more than just the bill of materials.kmmatney - Friday, August 15, 2014 - link
Maybe it cheaper to give the cpu it's own power, than routing it from the main connector? I'm sure every decision on this motherboard had cost in mind.DanNeely - Friday, August 15, 2014 - link
Probably to feed the GPU slot if someone puts a card with a decent power draw. The 24pin connector dates back to when 3.3/5V were used to power most of the mobo and only has 2 12V wires.MikeMurphy - Sunday, August 17, 2014 - link
Because when you plug in a 75w PCIe card you need all the power you can get.You make good points on the 770 but I think the point was to show which apps are CPU limited. The 5350 IGP is already well documented.
wrkingclass_hero - Friday, August 15, 2014 - link
0.0 dat power supply...Daniel Egger - Friday, August 15, 2014 - link
The selection of comparison points is rather strange, why compare power consumption of completely different aimed Intel systems (Servers, Top End of Halswells and an Atom?) rather than a Haswell Celeron or low end i3 while the benchmarks have a completely different and partially also much larger set of systems.ozzuneoj86 - Friday, August 15, 2014 - link
It seems like this happens a lot, and there are usually reasons for it, such as a lack of hardware to test on or time constraints, but if the results don't really tell us anything in the end, it is a bit frustrating. I think I said this the last time we had a Kabini review. Basically, the results often only show us that the CPU is slower than far more expensive systems, and that the AM1 CPUs increase slightly in performance as the price goes up... exactly as you'd expect. We get very little in the way of comparison between competing products, or even between old and new products. I really hope Anandtech will start supplying the reviewers with some more low end platforms if we're going to keep getting reviews like this. I just feel kind of bad for the writers of these nice reviews when the readers walk away from a review in the end not really having any more information about how the product compares to similarly priced options, slightly more expensive options, or older options that they might be able to get cheaper. They can only run tests with hardware that is available to them... and clearly there's a lack of entry-level hardware available to the guys here. I'm sure someone would be willing to donate some stuff to make these reviews more helpful. We need some comparisons with ivy and sandy bridge celeron (847, 1037u), older APUs (E350, A4 3xxx), Haswell celeron (G1830), older Athlons (X2, II X2, X2 e low power chips), Core 2 (E4300, E8400) and 771 Xeons (like the L5240, L5420, since they can be had for cheap now and modded to 775). These are the options I think of when I think of systems like Kabini, and they are for the most part nowhere to be seen in these reviews.